In computer networking, Localhost is used for accessing the networking services that are running on the host of loopback network interface.
Localhost describes the local computer address which is also known as the loopback address.
For example, when a Web browser is running on your computer, your computer is considered to be the ‘
A
Enabling a
Features:
- Fast, Efficient Code
- Secure Interfaces
- Easy Integration
- High Extensibility
Download ‘XAMPP’
XAMPP allows you to create a local web server with a simple and lightweight solution.
XAMPP stands for cross-platform, Apache, MySQL, PHP and Perl.
Download – ‘XAMPP‘
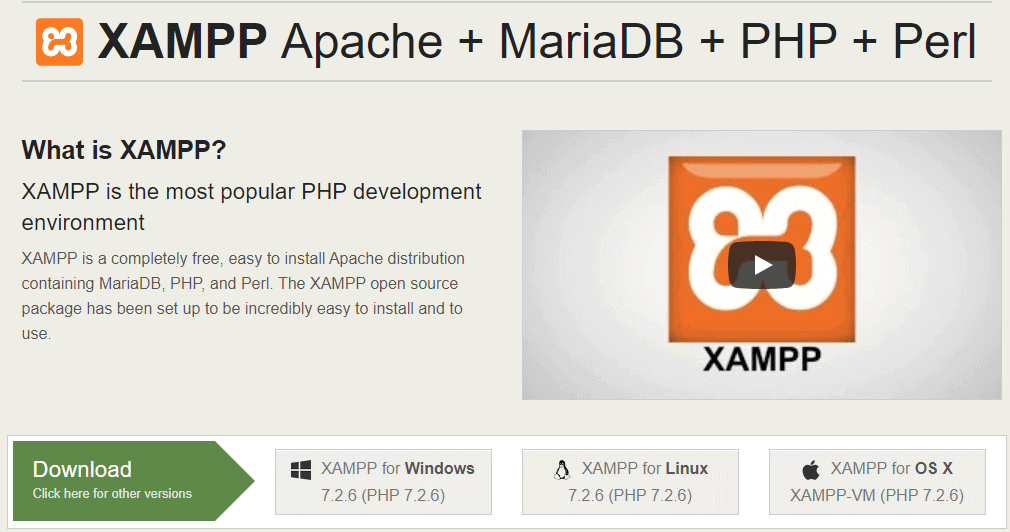
Click to download Latest Version7.2.6/PHP 7.2.6 for all platforms.

While installing XAMPP, you will be notified with several

XAMPP setup wizard will guide you through the installation.
Click ‘Next’.

Select the components you want to install and un-check the remaining components.
Click ‘Next‘.

During the installation process, choose a folder to install XAMPP.
I’m going to create a new folder in “C:\xampp“.
Click ‘Next‘.

Next window, you will be asked that whether you would like to install Bitnami For XAMPP
As we are going to install WordPress website manually, untick on ‘Learn more about Bitnami for XAMPP’.
Click ‘Next‘.

After completing all the steps during the installation process, Now XAMPP is Ready to install.
Click ‘Next‘.

After installing the XAMPP setup on your computer, you will be asked to start the Control Panel now then check the option.
Click ‘Finish‘.

To start the server, Click ‘Start’ of Apache and MySQL Module.

Enter the URL – “localhost” or can also Enter – 127.0.0.1 to open the localhost dashboard.

Download and Install WordPress
Download the latest version of WordPress

To get WordPress with XAMPP, we need to unzip the installed WordPress folder.
Go to the XAMPP folder on your computer,
Open the “htdocs” folder ( “C:\xampp” )
Unzip WordPress folder into “htdocs” folder.
The unzipped file name in “htdocs” folder is “wordpress“.
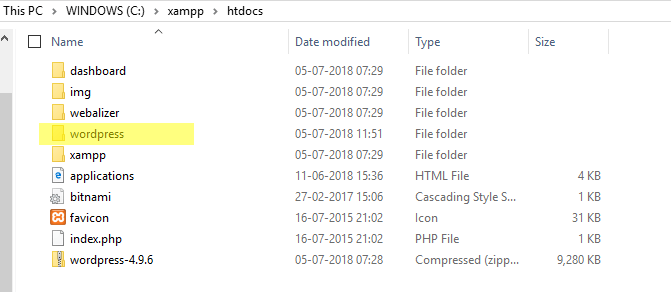
Enter the URL – “localhost\wordpress“
Click “Continue“.
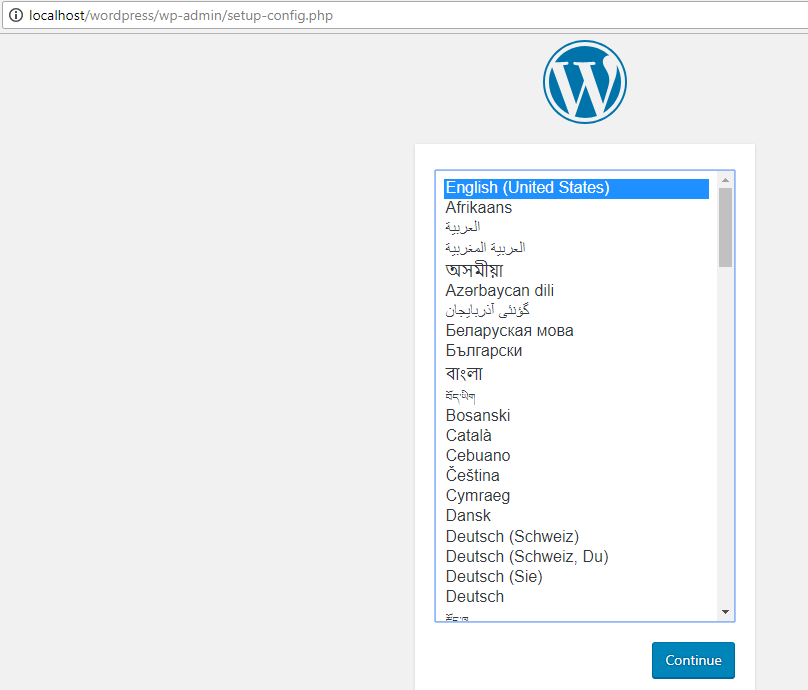
Before accessing the WordPress Website, we need to create some information on the database which provides the Database name, Database username, Database password, Database host, Table prefix ( if you want to run more than one WordPress in a single database ). Click “Let’s go!“.


To establish a database connection, first, you should create a database in
Enter the URL – “localhost/phpmyadmin“
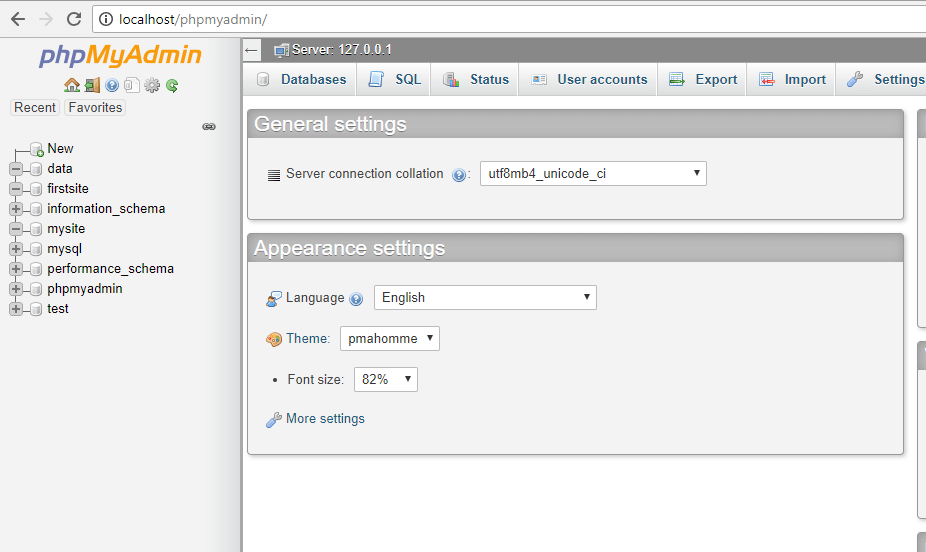
Click “New“
Enter the database name in the first field of “Create database”.
Database name – exampledb
In the second field select the first option “Collation”.
Click “Create“

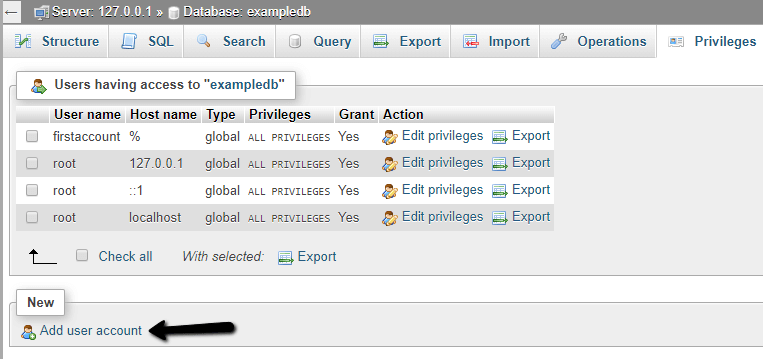
Click on “Privileges“

Click on “Add user account“
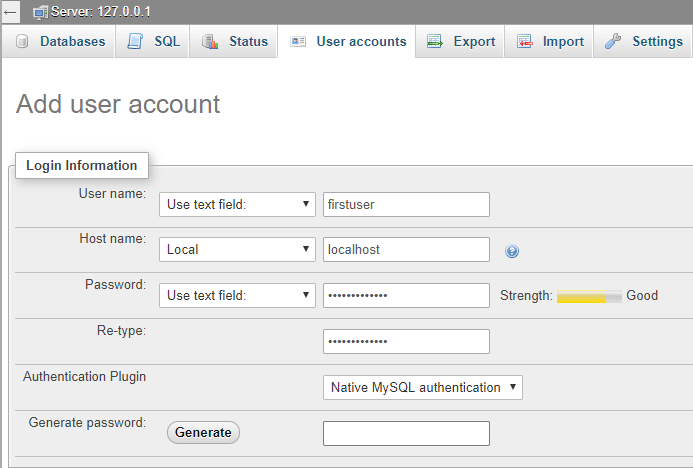
Add the login information to create user account.
Click on “Check all” field in Global privileges.
Click “Go“

An account is created with the particular details.
Now enter the details in the fields.
Click “Submit“
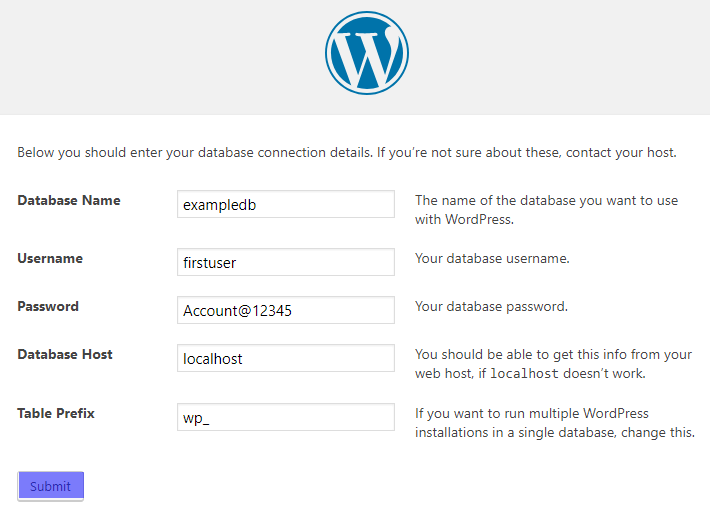
Now WordPress can communicate with your database.
Click “Run the installation”

You will be directed to the Welcome page of WordPress installation process.
Fill the information below in the fields.
Click “Install WordPress“

Now WordPress is successfully installed in your device.
