Google Analytics for Click to Chat for WhatsApp Plugin, using Google Tag Manager.
Google Tag Manager ( GTM ) have some Advantages, instead of directly hard-coded Google Analytics Scripts.
Using GTM it’s completely in your control. You can set your desired Event Tracking parameters. ( Category , Action , Label )
From Version 1.6 – can enable Google Analytics directly from Plugin Settings. ( This will work even Google Analytics installed using GTM )
pre-requisites
Google Analytics is installed using Google Tag Manager
Install Google Analytics using Google Tag Manager
Useful stuff
Useful stuff to create events
All the styles contains “ctc-analytics” class name to track clicks
To get the style name, for all the styles added a data attribute
like – data-style=”style-{{number}}”
e.g. – data-style=”style-3″

Create an Event When user Clicks on Chat Item
Enable Build in Click Variables
From Google Tag Manager Container
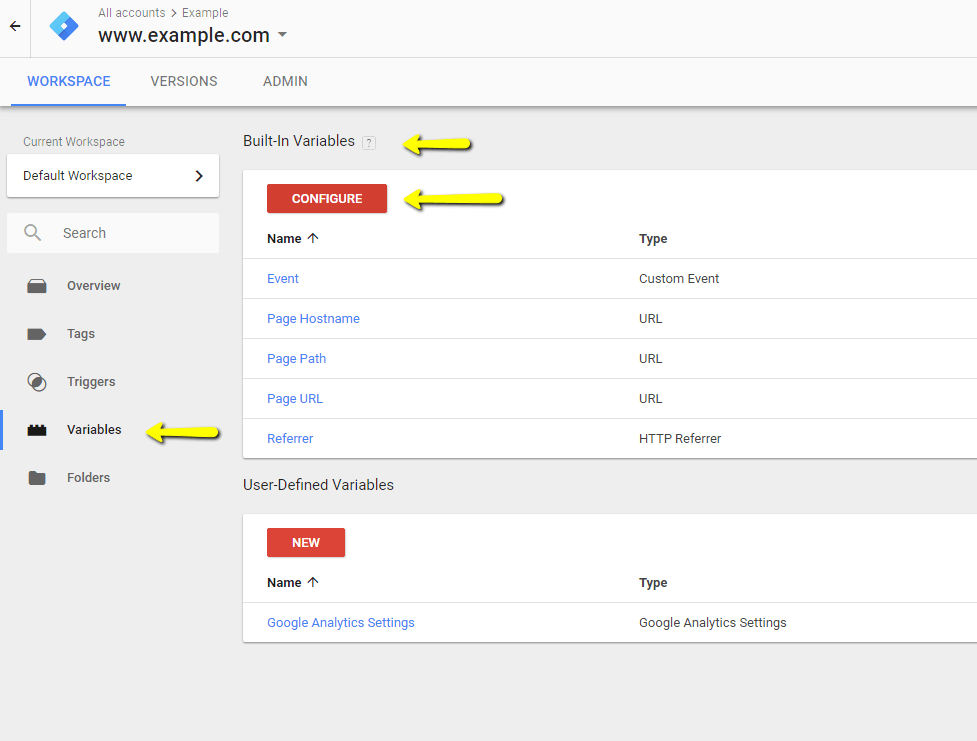
Click on “Variables” from the left side menu
and at “Built in Variables” click on “Configure“
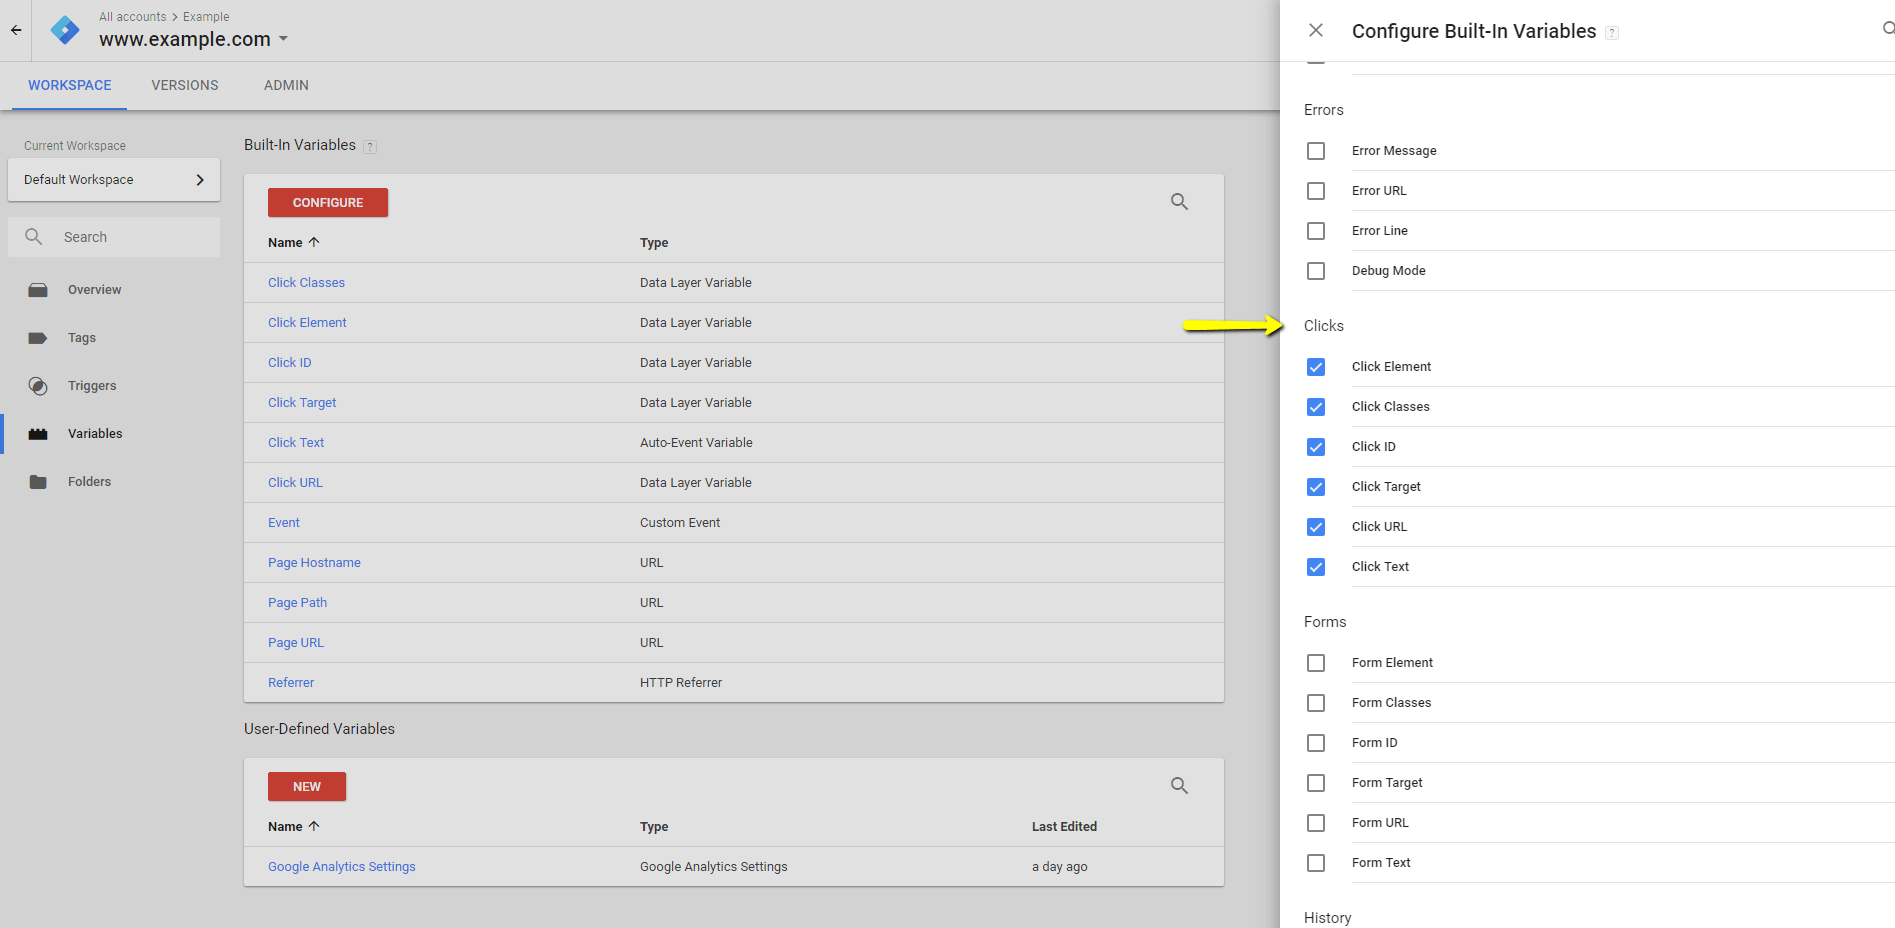
From the right side modal – at the Clicks select the click variables what needed. ( only one thing is important here is – “Click Classes” )
Create User-Defined Variables, to find data attribute value – ( To get the style number )
( This is not an important step – this will be useful to get the clicked style number, In most cases if you added a floating style – you know what style is added, so what the use to get the style number, but in case if you added shortcodes or A/B testing , this will be useful )
To find which Style item is clicked, This plugins adds a data attribute with the style name – data-style=”style-{{number}}”
e.g.
For Floating Styles – data-style=”style-3″
We will create a User-Defined Variable, to find the data attribute value
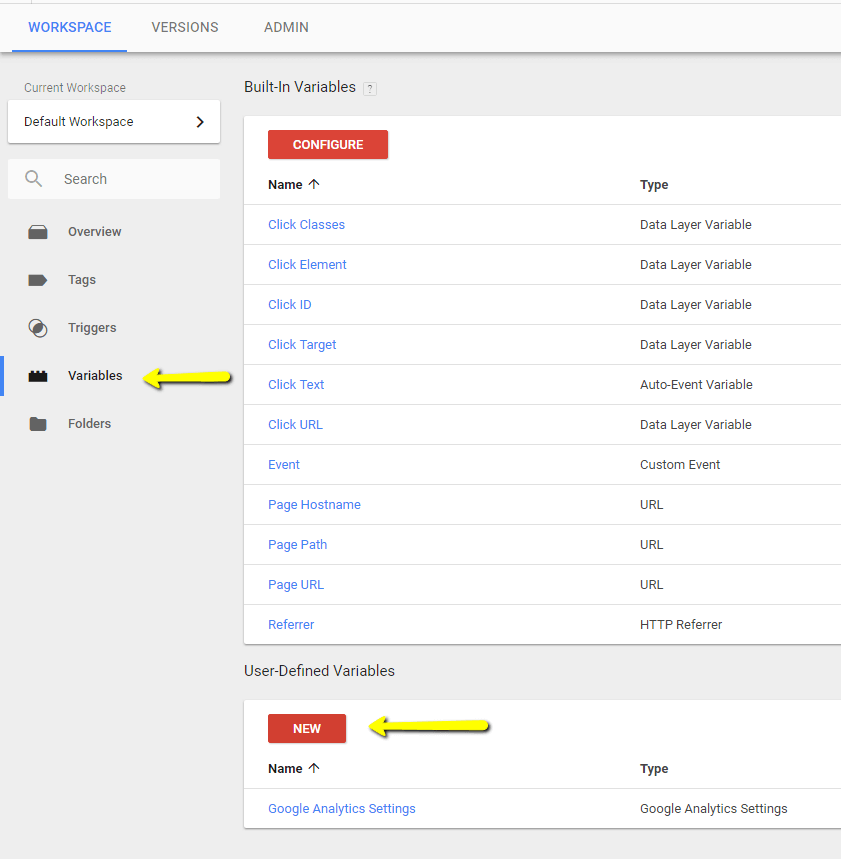
From “Variables” and at “User Defined Variables” click on “New“
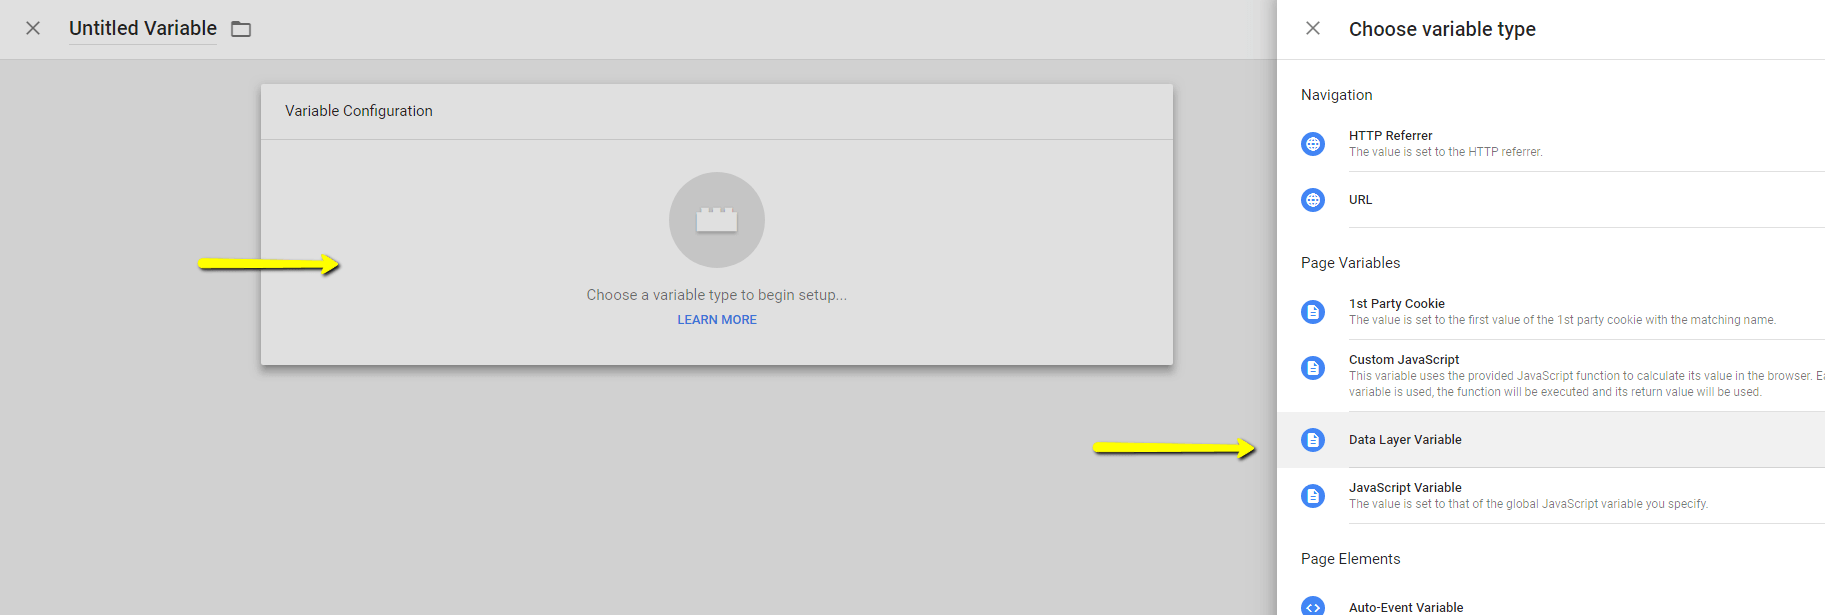
Click on “Variable Configuration” area
and then select “Data Layer Variable“
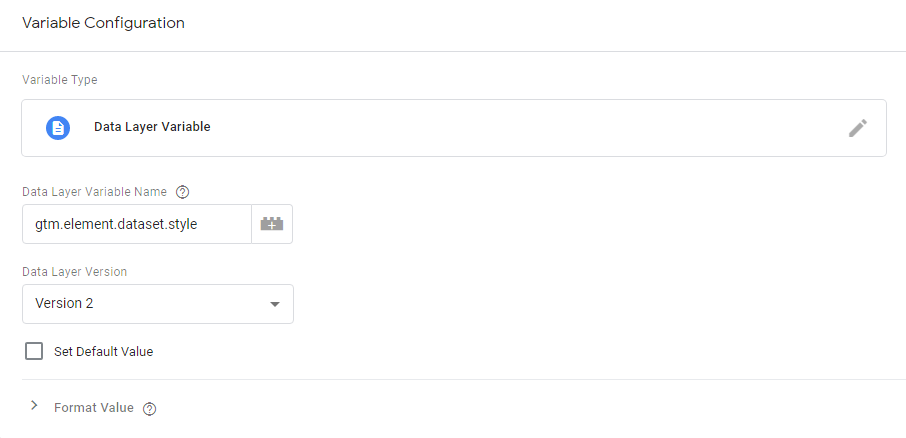
And at the “Data Layer Variable Name“
Enter this “gtm.element.dataset.style“
gtm.element.dataset.style – this will give the style type.
Click on “Save“
Create Triggers
Now we will create triggers where and when to fire ..

From the Right side menu – click on “Triggers” and click on “New“

And then Click on “Trigger Configuration” area
and at the “Click” section, select “All Elements“
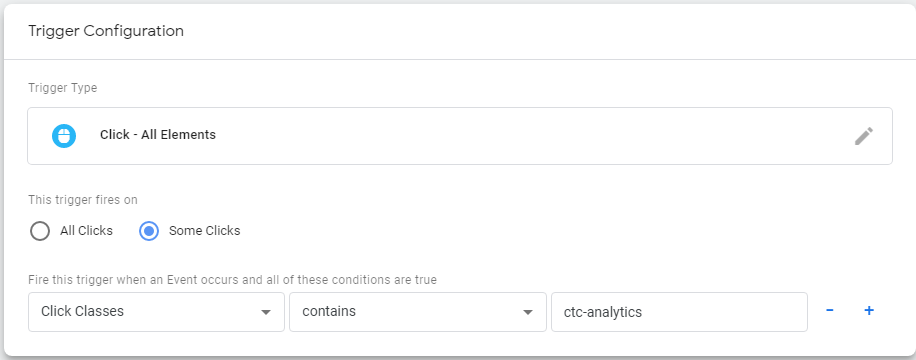
Now click on “Some Clicks” ( we are tracking on clicks, where the clicked element contains “ctc-analytics” class )
and create a condition when to run this trigger
“Click Classes” – “Contains” – “ctc-analytics“
and click on “Save“
Create Tags
so far, we enabled click variables, and we created a trigger and set a condition where to fire the trigger
And now we will create a Tag – In this we will Configure what the details have to pass to Google Analytics Account.
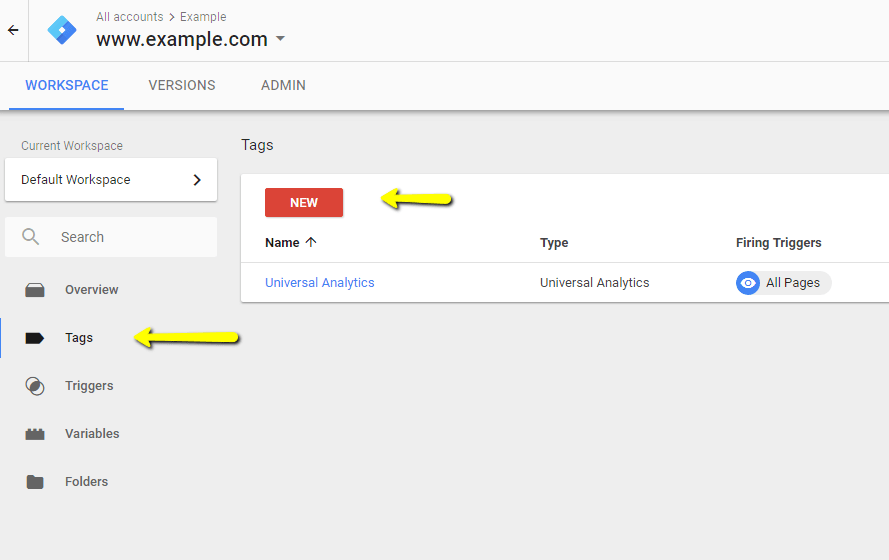
Click on “Tags” and then click on “New“
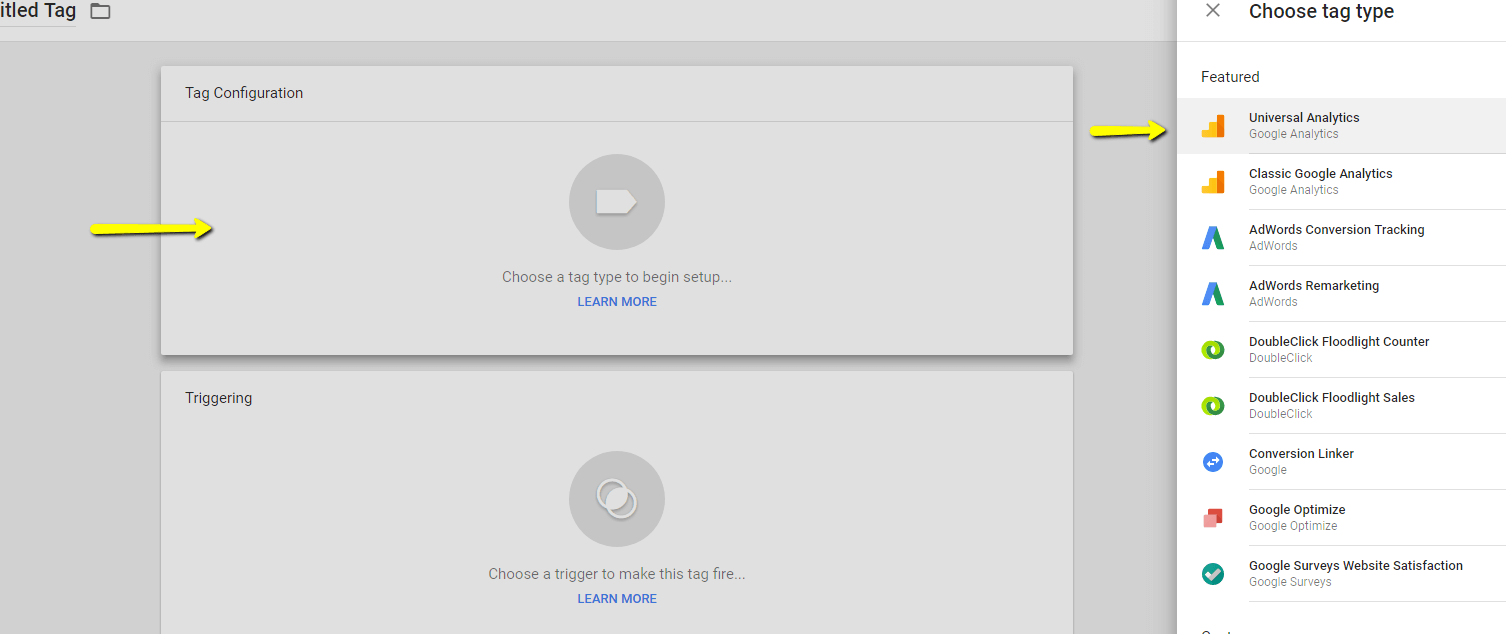
Click on “Tag Configuration” area
and select “Universal Analytics – Google Analytics“
( If you using Classic Analytics – ga.js – select that option, mostly you might be using Universal Analytics only )
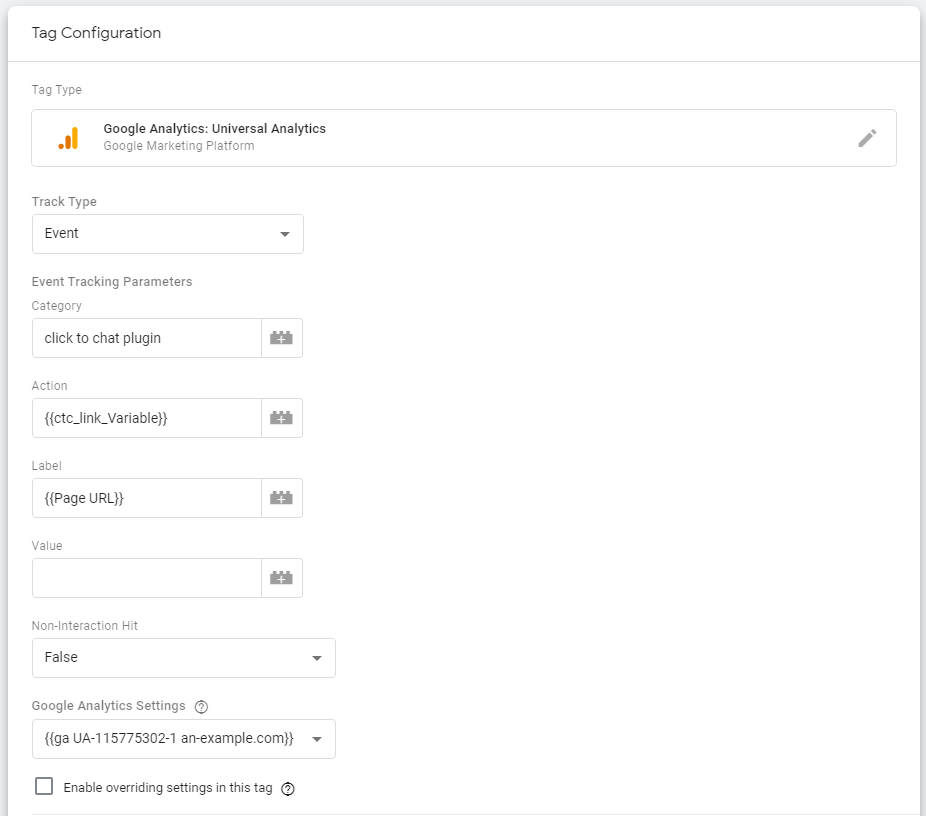
Select the “Track Type” as “Event“
The “Event Tracking Parameters” is what you will get in Google Analytics,
( The [ + ] symbol right to the input box to choose Variables )
The Event tracking is hierarchy, Category and then Action and then label
( organised thing in a way how you will understand the events in Google Analytics – we just added a sample )
Category – top level hierarchy ( WhatsApp or click to Chat or similar )
Action – second level hierarchy – ( on which style item, or similar )
To find which style item is clicked – click on the [ + ] symbol right to the input box to choose variable ( In the above – we already created a variable to get the style number )
Label – Third level hierarchy – ( Page URL – on which page the user takes action )
Now Select the Trigger, where this tag have to run ( In the above – we already created trigger to fire – when click element class contains ctc-analytics )
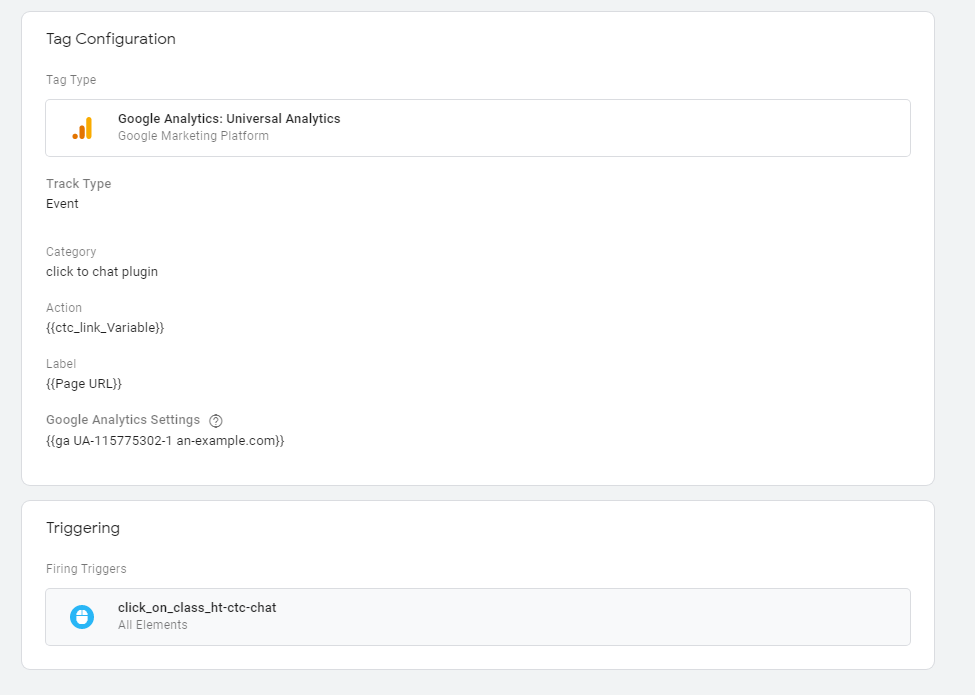
Save changes,

( preview – for verification on how things works, open your website in new tab in the same browser, we can preview how things are working. After preview click on leave preview ) and then “Submit
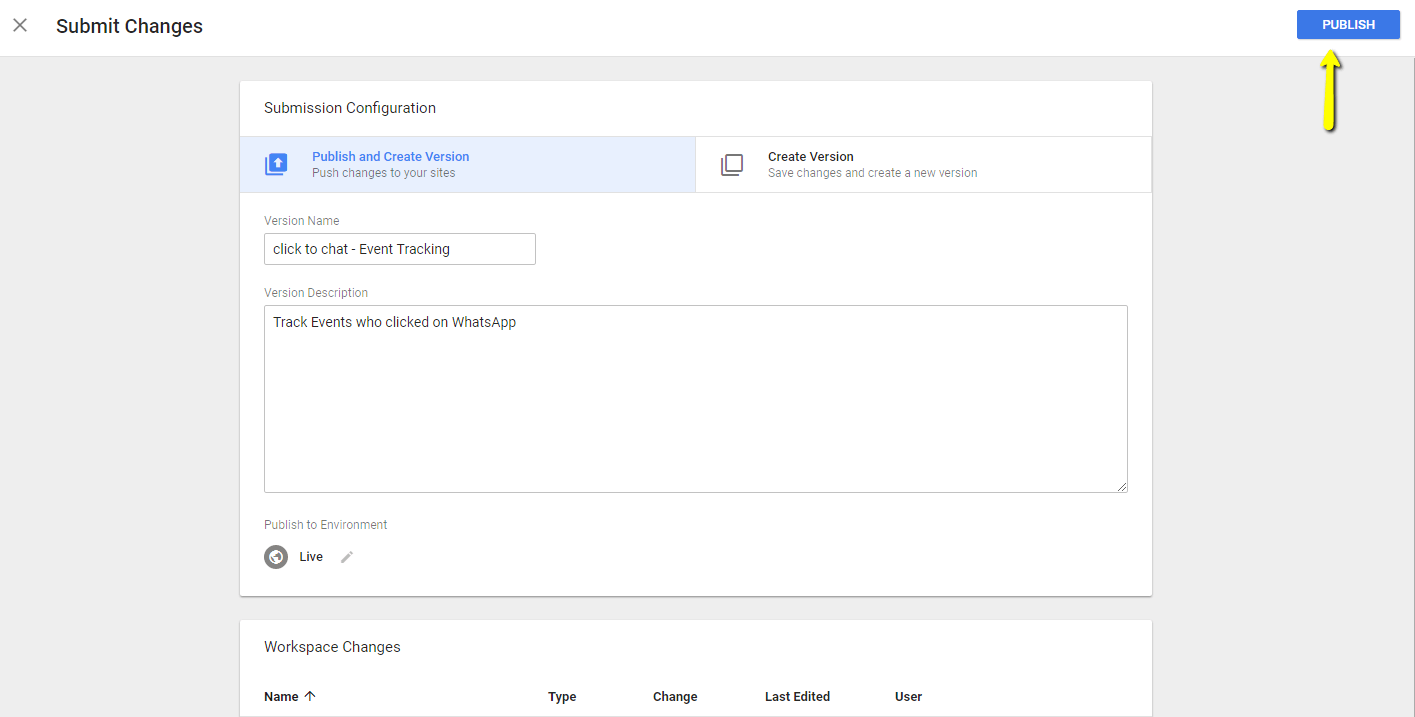
“Publish and Create Version” to publish changes to your website
or navigate to “Create Version” tab to just save the change