The Click to Chat plugin by HoliThemes lets you easily communicate with website visitors via WhatsApp. Here’s a quick guide to install, activate, and set it up on your WordPress site.
Step 1: Log In to Your WordPress Admin Dashboard
- Open your browser and navigate to your WordPress admin area by entering your website URL followed by
/wp-admin(e.g.,https://yourwebsite.com/wp-admin). - Enter your administrator credentials to access the dashboard.
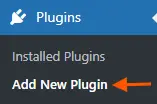
Step 2: Navigate to the Plugin Installation Page
- In the left-hand menu, locate Plugins and click on Add New.
Step 3: Search for the “Click to Chat” Plugin
- In the Search Plugins box in the top-right corner, type “Click to Chat.”
- Wait for the search results to populate.
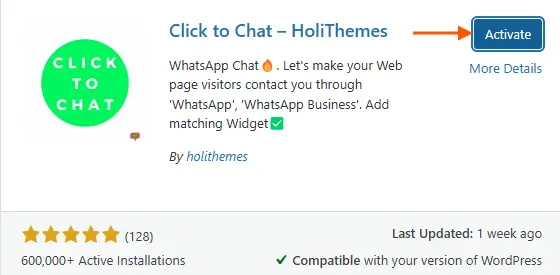
Step 4: Install the Plugin
- Locate the Click to Chat plugin by HoliThemes in the search results.
- Click the Install Now button next to the plugin.
- WordPress will automatically download and install the plugin.
- Once the installation is complete, the Install Now button will change to Activate

Step 5: Activate the Plugin
- Click the Activate button to enable the plugin on your website.
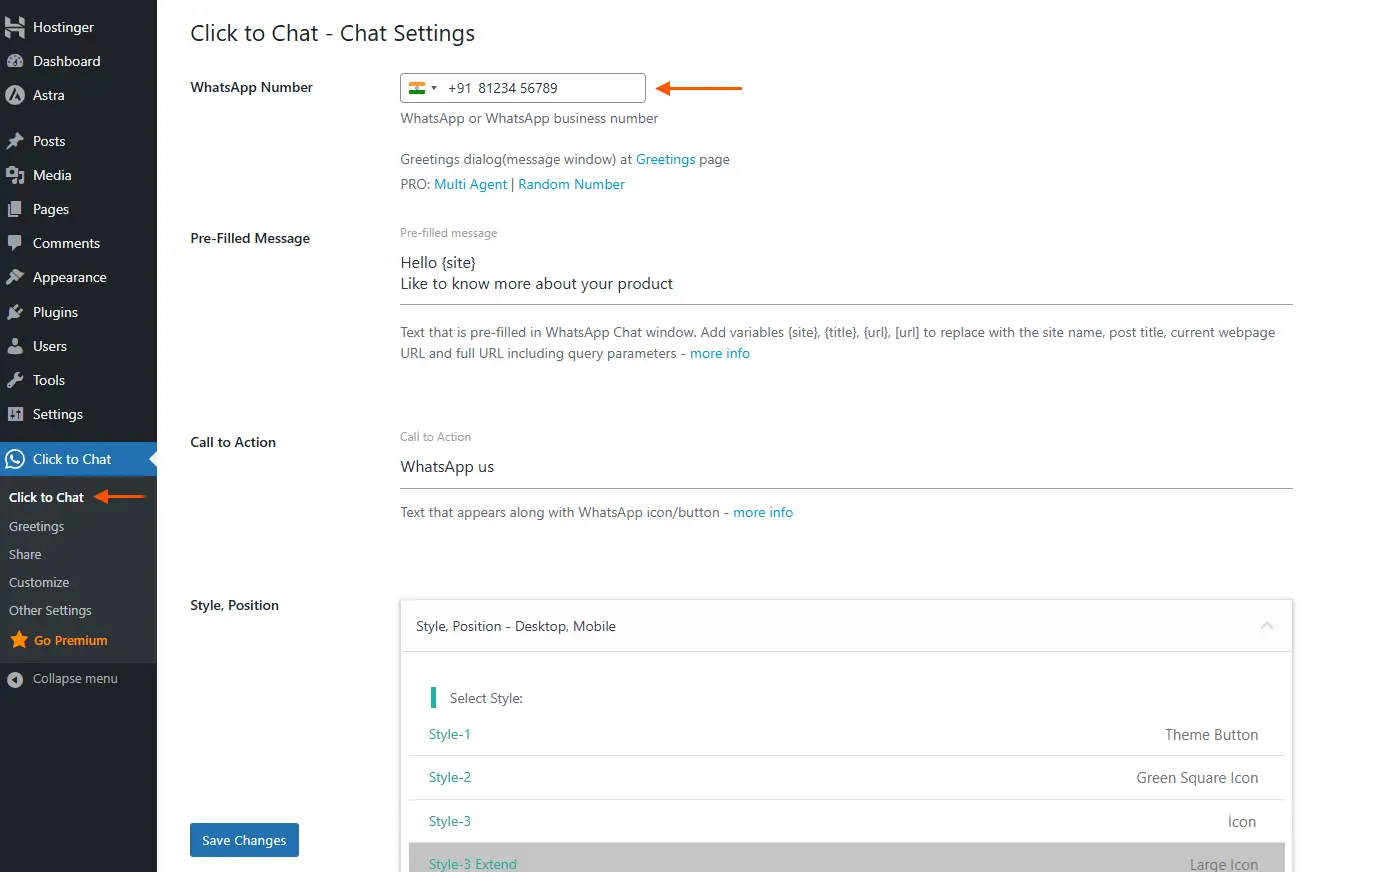
Step 6: Configure the Plugin Settings
- After activation, return to the plugins page.
- Find the Click to Chat plugin and navigate to Click to Chat in the left-hand sidebar.
- On the settings page:
- Enter your WhatsApp number.
- Customize the chat button settings, including button text, position, and styling options.
- Save your changes by clicking the Save Changes button at the bottom of the page.
Step 7: Verify the Plugin Functionality
- Visit the front end of your website to ensure the WhatsApp chat button is displayed as expected.
- Click the button to test if it redirects correctly to your WhatsApp chat.
Additional Tips for Optimization
- Keep the Plugin Updated: Regularly check for updates under the Plugins section to ensure optimal functionality and security.
- Advanced Customizations: Refer to the plugin documentation or support forum for guidance on advanced settings and troubleshooting.