In the Click to Chat plugin, we can hide/show the widget on specific posts by entering their Post IDs. Simply add the Post IDs, separated by commas ( , ).
Show the Widget Only on Selected Posts
To display the widget only on certain posts or pages, follow these steps:
- Navigate to Click to Chat → Display Settings.
- Under the Global section, select Hide on all pages.
- Scroll down to the Post IDs section.
- Enter the Post IDs where you want the widget to appear.
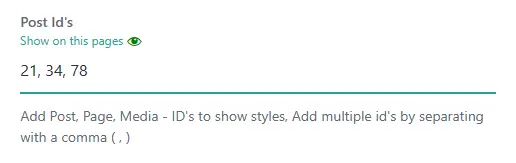
For example:21, 34, 78– How to Find Post ID
- Click Save Changes.
This setup hides the widget by default and shows it only on the specified posts/pages.
Hide the Widget only on Selected Posts
To show the widget on most pages but hide it on specific ones, follow these steps:
- Navigate to Click to Chat → Display Settings.
- Under the Global section, select Show on all pages.
- Scroll down to the Post IDs section.
- Enter the Post IDs where you want to hide the widget.
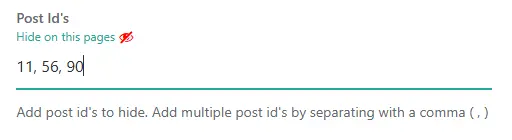
For example:11, 56, 90– How to Find Post ID
- Click Save Changes.
This setup enables the widget globally and excludes it only from the specified posts/pages.
How to Find Post ID:
- From the WordPress Dashboard:
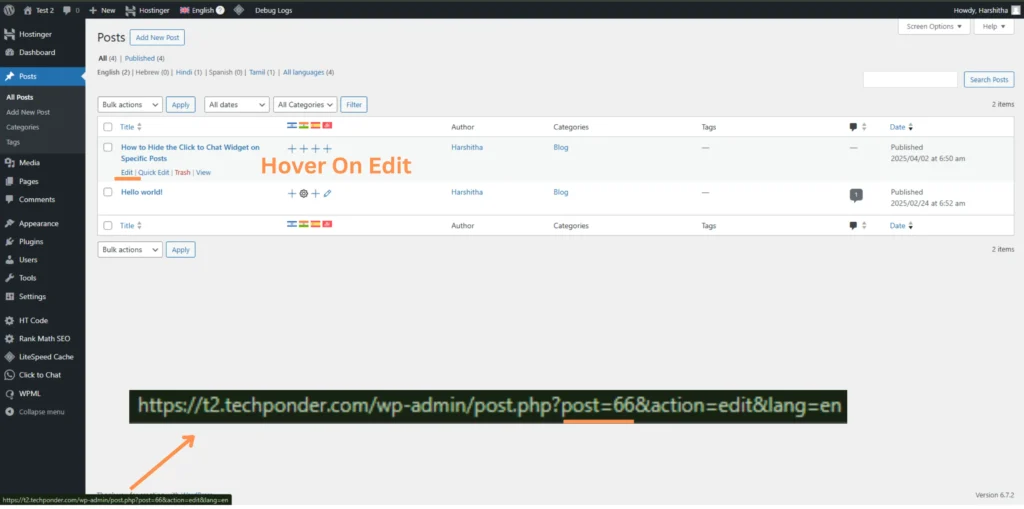
- Go to Posts
- Hover over the title of the post or on edit.
- Look at the bottom-left corner of our browser; we will see a URL like
post=66. Here,66is the Post ID.
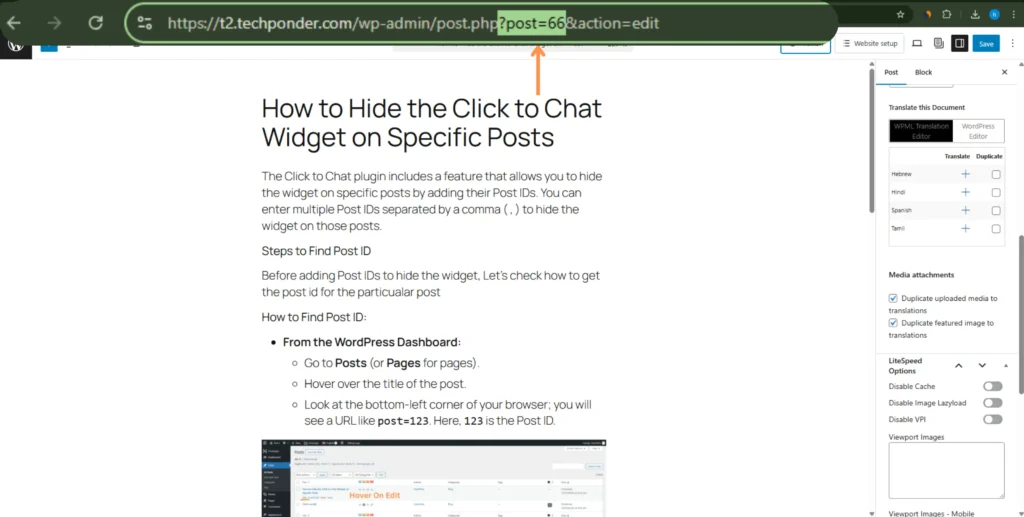
- From the Post Editor:
- Open the post we want to find the ID for.
- Check the URL in our browser’s address bar.
- We will see something like
?post=66. The number is our Post ID.
Notes: Ensure that we are entering the correct Post IDs to avoid any issues.
Use Case Ideas
- Show the widget only on our contact or pricing pages.
- Hide the widget on long-form blog posts to reduce distraction.