The Multi Agent feature is designed to manage multiple agents, each with their own time range, ensuring seamless support throughout the day
🔗 Included in the PRO plan — View Pricing
Enable Multi Agent
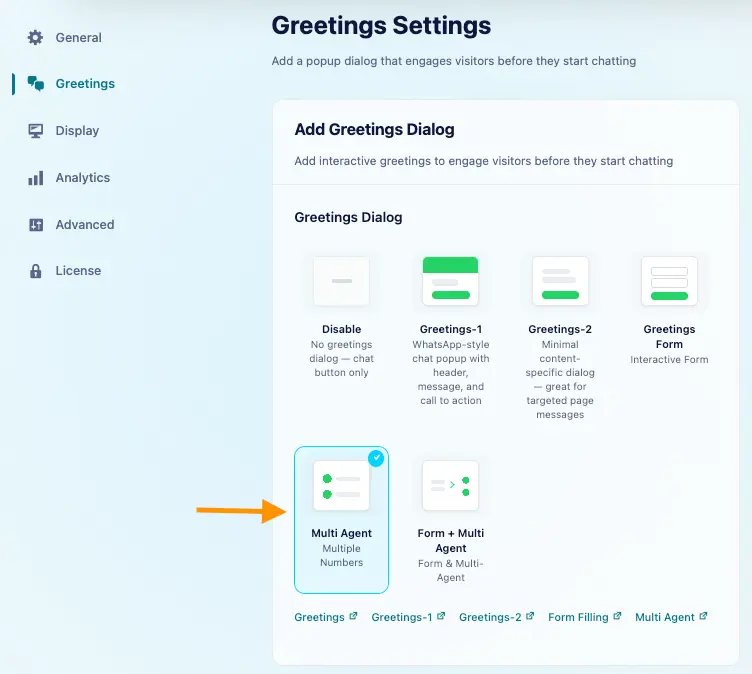
Navigate to Click to Chat → Greetings.
In Add Greetings Dialog, select the Multi Agent template. The Multi Agent card appears below it.
Add Agents
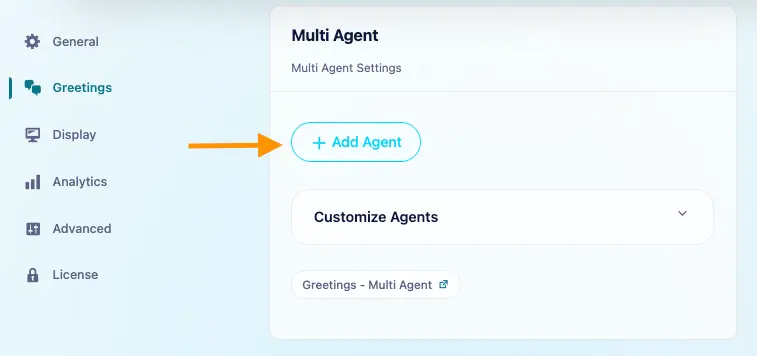
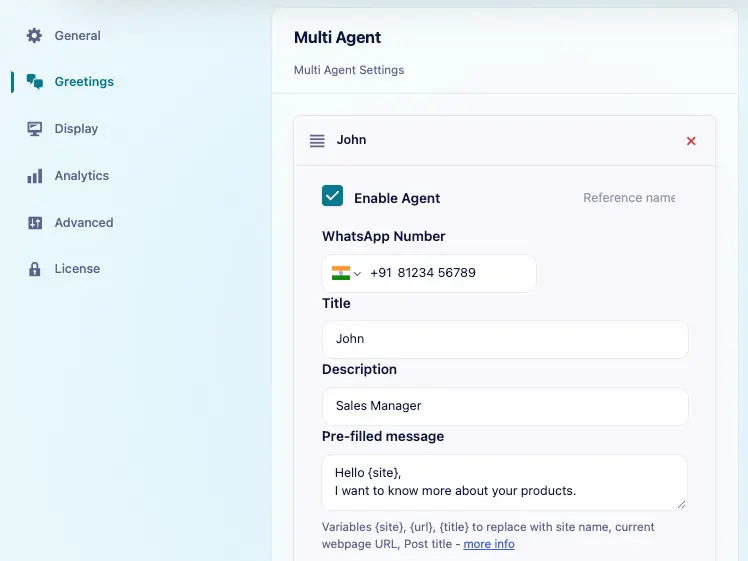
In the Multi Agent card, click Add Agent, keep Enable Agent checked, and enter the agent’s details. Repeat for each team member or department, then click Save Changes.
WhatsApp Number:
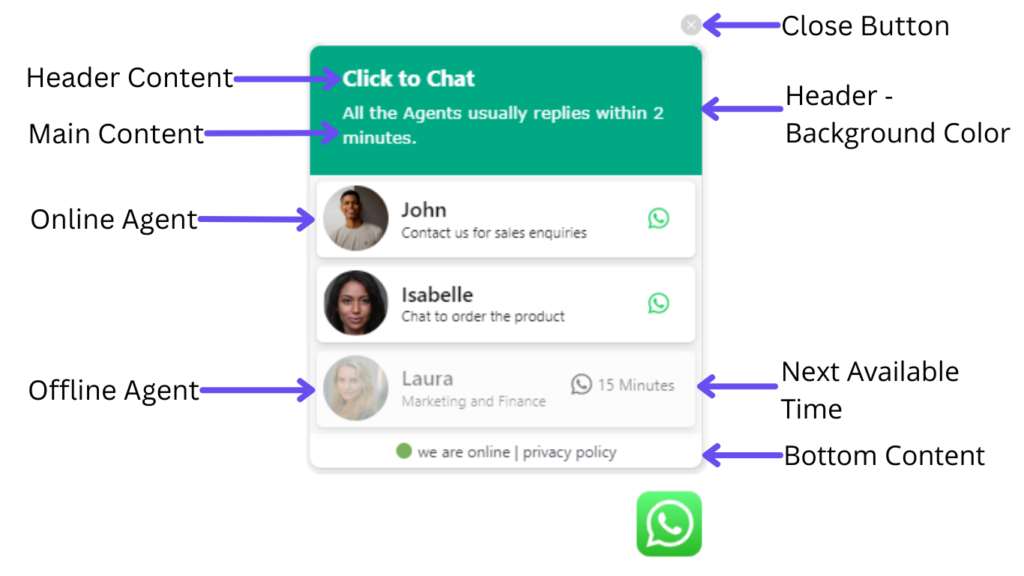
This number is assigned to the agent and is displayed at the front end of the website. We can either select the country code from this library or we can enter the country code starting with ‘+’ in the text box.
Title:
This field refers to the Title that is displayed in the first line at the front end.
Description:
The Text entered at Description appears in the second line at the front end design.
Pre-filled Message:
The Pre-filled Message appears on the chat link page when clicked on the respective agent. If no pre-filled message is entered, the plugin displays the Main pre-filled message entered at the Click to Chat settings.
Agent Image:
To add an image to the agent, click on Agent image and select the image. If no image is selected, the plugin displays the default WhatsApp icon.

Click Remove to return to the default WhatsApp icon.

Agent Availability:
Under each agent’s Availability Settings, choose whether the agent is available all day or only during selected days and times.
24×7 online
Choose 24×7 Online to show the agent as online every day, at all times.
Set timings
Choose Set timings to configure a weekly schedule for this agent. Each agent can have different days and time ranges.
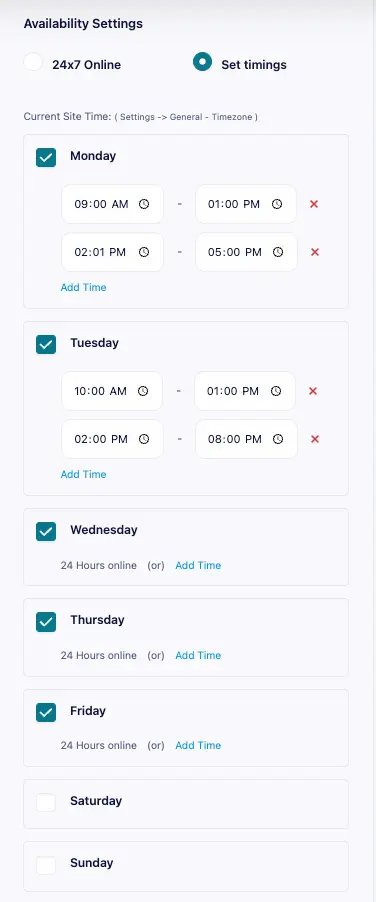
- Check the days the agent is available. Leave unavailable days unchecked.
- For an enabled day, click Add Time and enter the start and end times. Add more ranges for different shifts.
- Leave an enabled day without time ranges for 24-hour availability.
Schedules follow the timezone in WordPress → Settings → General → Timezone. Check Current Site Time before entering the agent’s schedule, then click Save Changes.
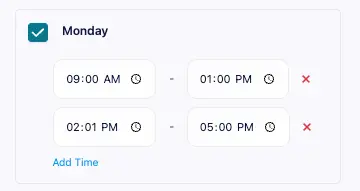
In this example, the agent is online on Monday from 9:00 AM–1:00 PM and 2:00 PM–5:00 PM.
Outside these ranges, the agent follows your Offline Agents Handling setting. For a shift crossing midnight, add one range ending at 11:59 PM and another starting at 12:00 AM on the next day.
Reference Name:
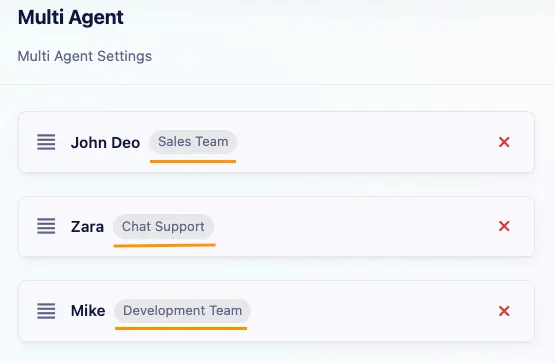
This field is used internally to identify the agent’s reference. For example, department name, agent shift, etc. The reference name and Title name appear in the collapsed header.
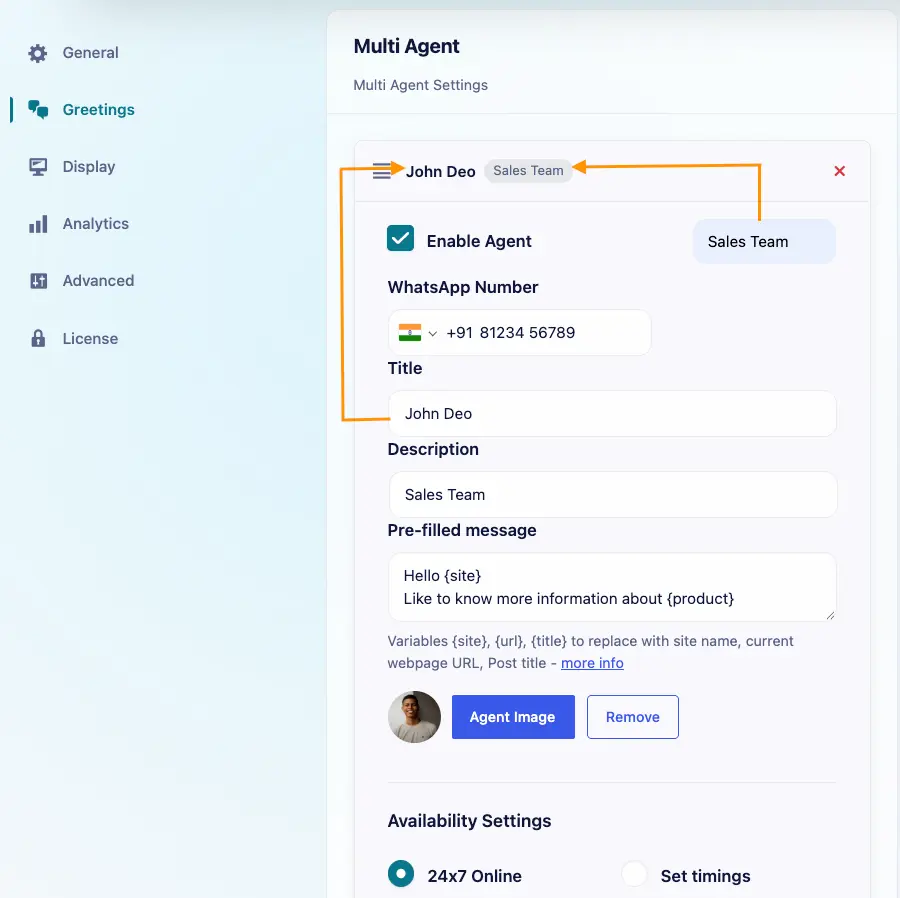
In the Admin settings, the Title and Reference names appear within the Collapsed Header. These are used to easily identify which team or domain they belong to for better organization.
Offline Agents:
Select how agents should appear during offline hours from the below list.
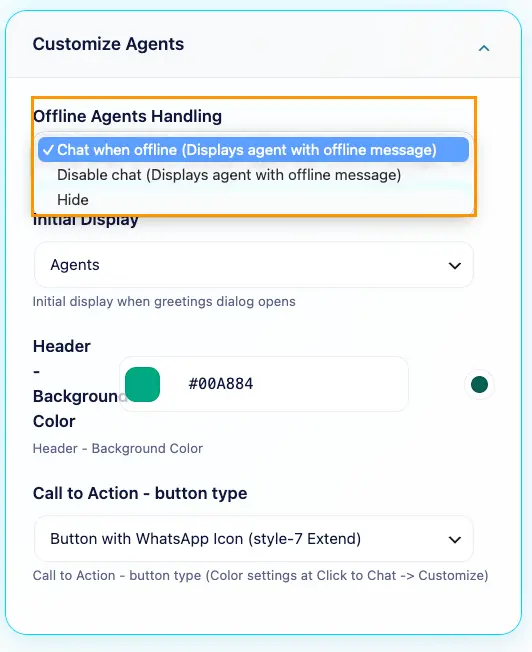
Chat when offline: Although agents appear as offline with the next available time duration in the front end, users still can chat with the agent during offline hours too.
Disable Chat: Agents appear with the next available time duration but, users can’t click on the agent to chat with them when offline.
Hide: Hides the agent when offline. An agent is no longer displayed in the front end until online hours.
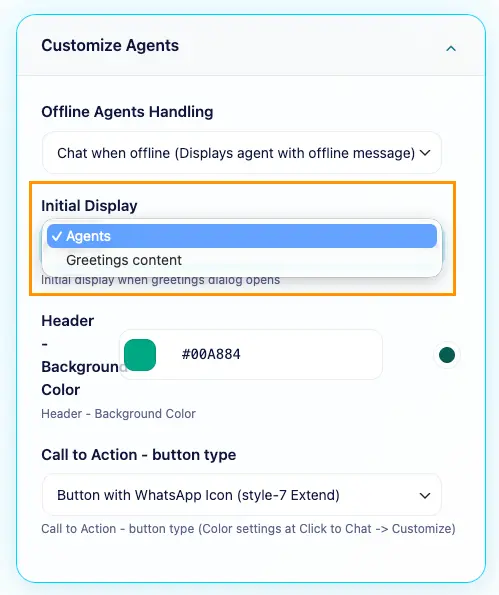
Initial Display:
Select ’Agents’ to display Agents in the front end or choose ’Greetings Content’ to initially display the Greetings Template, and when clicked on WhatsApp at Greetings Template, it opens Multiple Agents.
Organize Agents
Drag an agent using the handle beside its header to change the order, then click Save Changes.
Enable/disable agent:
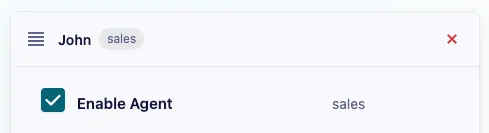
To disable an agent temporarily instead of completely deleting the Agent, we can uncheck Enable Agent. When an agent is not enabled, the Agent won’t appear at the front end.
Remove Agent:
To remove/delete an agent completely, click on the close button and save changes. The Agent’s data is no longer displayed.

Greeting Actions
Under Click to Chat → Greetings → Actions, configure when the dialog opens. These actions open the agent list or greetings content, depending on your Initial Display setting.
🔗 Included in the PRO plan — View Pricing
- Set Greetings Initial Stage to Open under Additional Settings to open the dialog on page load. If a visitor closes it, Actions can open it again.
- Choose Close to keep the dialog closed until a visitor clicks the widget or a configured action opens it.
Time Action:
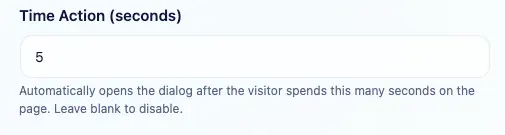
Enter the number of seconds in Time Action (seconds). For example, enter 10 to open the dialog after 10 seconds. Leave the field blank to disable this action.
Enable Don’t reopen after the visitor closes Greetings if you do not want Time or Scroll actions to reopen a dialog the visitor has closed.
Scroll Action:
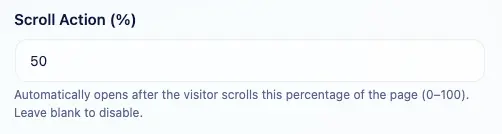
Enter a value from 0 to 100 in Scroll Action (%). For example, enter 50 to open the dialog after the visitor scrolls through 50% of the page. Leave the field blank to disable this action.
If both Time and Scroll actions are configured, the first condition reached opens the dialog.
Click Action:
Add the ‘ctc_greetings’ class name to any element. When the user clicks on that element, the greetings dialog appears.
Click this button to see the Greetings Click Action Demo :
View Port
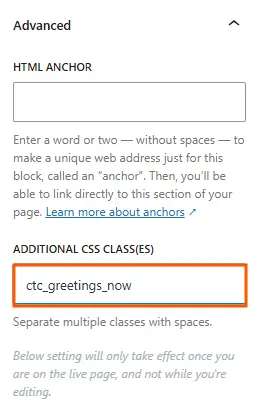
When an element with the class name ‘ctc_greetings_now’ is in the viewport, the greetings dialog appears.
To add a class name – select any element and at the right sidebar settings at ‘Advanced’ –>‘Additional CSS class(es)’ Add ‘ctc_greetings_now’ as the class name.
Multi Agent Translation using Localization Plugins
The Multi-Agent feature works well with translation plugins like WPML and Polylang
You can translate all the text shown for each agent
- Agent name
- Description or role
- Pre-filled message
- Phone number