🔗 Included in the PRO plan — View Pricing
Customize the Content
Use the Content card to edit the text shown above and below the form:
- Header content
- Main content
- Bottom content
Variables like {site},{title}, and {url} can also be used in these text editors. The values of these variables are replaced dynamically:
{site} – changes to the current website name.
{title}- changes to the title of the current page. (If it’s the home page, then change to the website name.)
{url} – replaces with the current page URL.
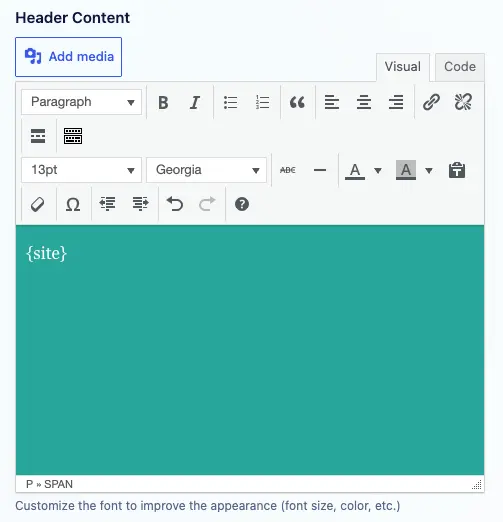
Header Content:
The text present in the header content appears at the top of the greetings dialog.
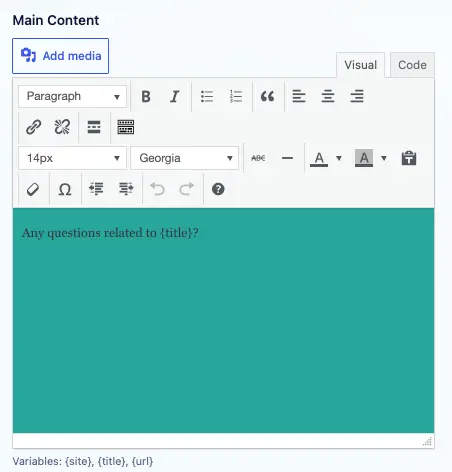
Main Content:
The content present in the main content appears inside the message box of the greetings dialog body.
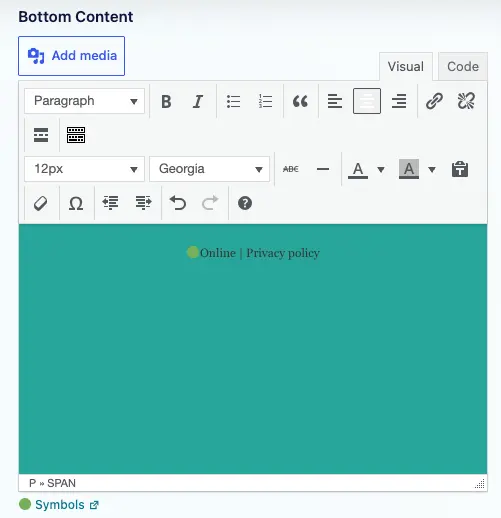
Bottom Content:
The text present in the Bottom Content appears at the bottom part of the greetings dialog.
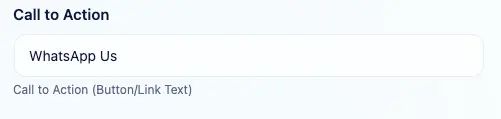
Call to Action:
This text appears on the WhatsApp button of the greetings dialog.
Greetings Form Builder:
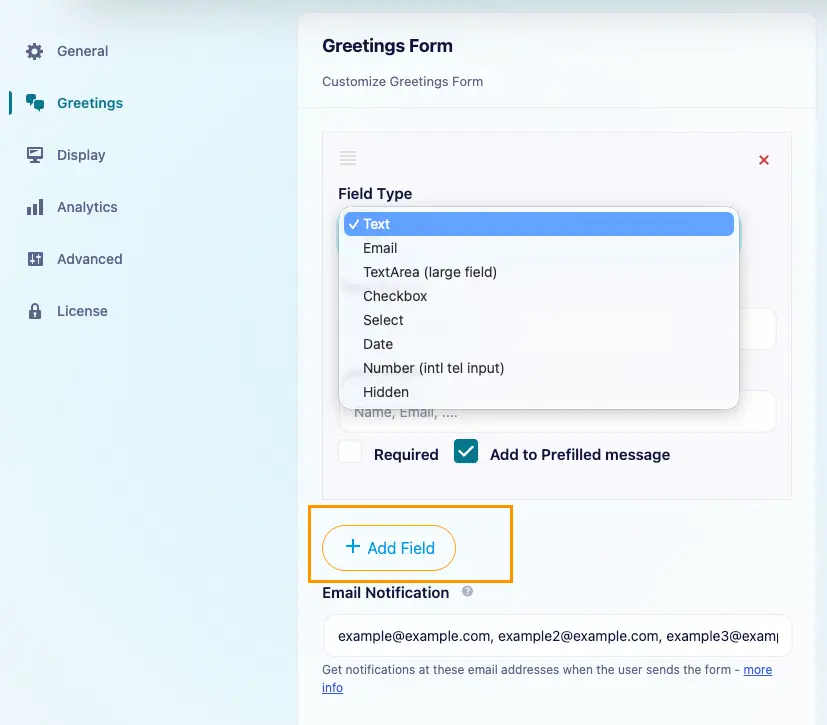
In the Greetings Form card, click Add Field and choose a Field Type. There are eight types: Text, Email, TextArea, Checkbox, Select, Date, Number, and Hidden. Add the fields we need, then drag the handle to change their order or use the remove icon to delete a field.
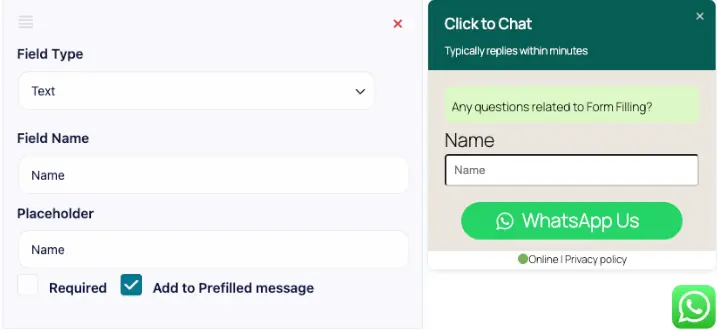
Text:
A test accepts a single line input.
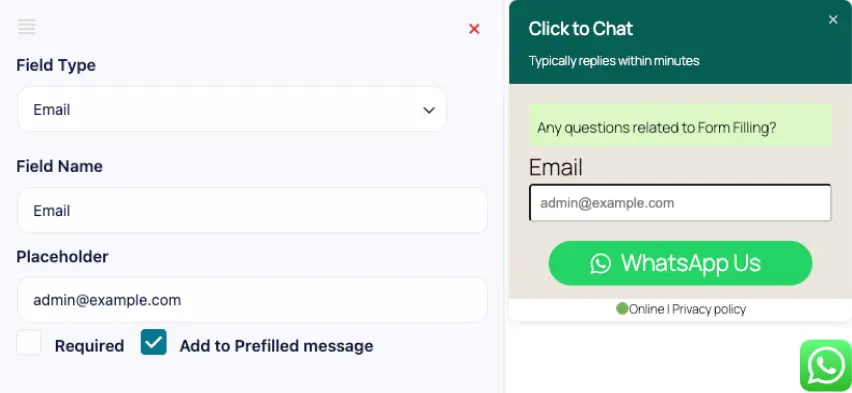
Email:
Email is a text box that accepts email ids as input.
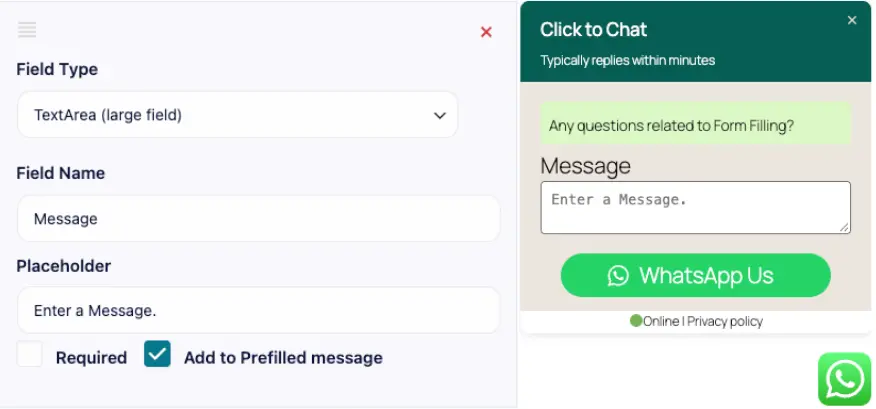
Text Area (large field):
The text Area accepts multi-line input. It can be used for Messages, and feedback which takes more data.
Checkbox:
A Checkbox lets users confirm an option, such as accepting our privacy policy. Enable Required if visitors must check it before submitting.
To add a link to a checkbox label, enter it in Field Name using this format:
[text](link)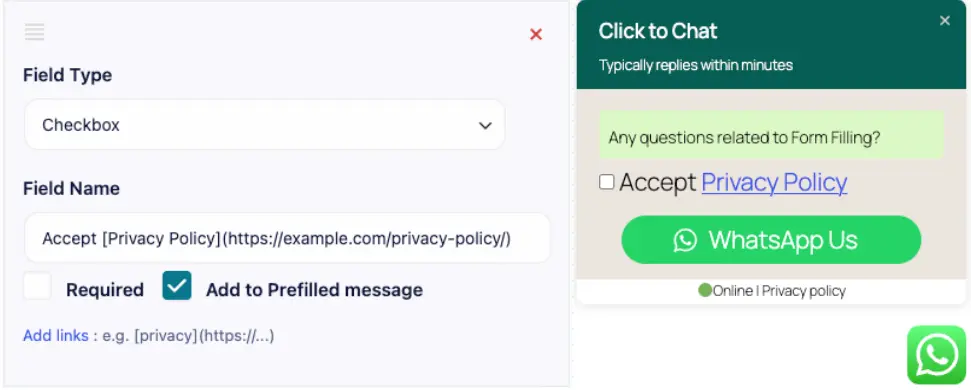
Select
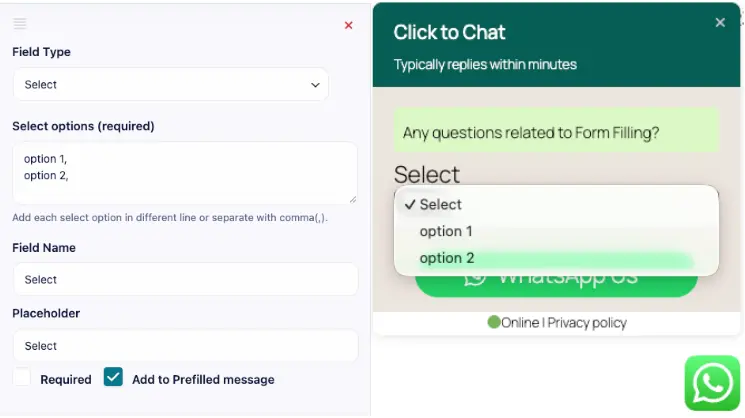
A Select field lets users choose one option from a dropdown. Enter the choices in Select options (required), one per line or separated by commas.
Date:
The Date Field allows users to select a date or schedule a date and time directly from the Greetings Form before starting a WhatsApp chat. It supports Date Only mode and a full Scheduler (Date & Time) with availability and duration
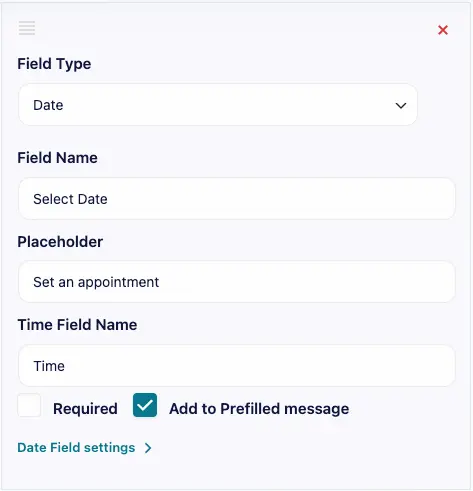
After adding a Date field, use the Date Field Settings accordion to choose Date Only or Scheduler (Date + Time).
Date Only Mode: (View Demo)
Date Mode allows users to select only a date from the Greetings Form, without choosing a time. This is useful when the exact time is not required and only a preferred or required date needs to be collected before starting the chat.
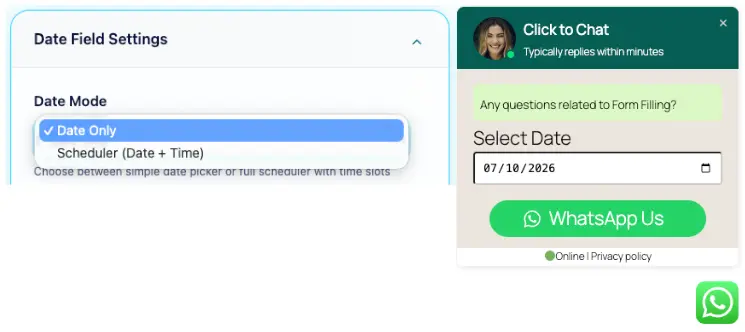
- In the Date Field settings, we can add min and max dates to show only available booking days and disable unavailable ones.
Scheduler (Date+Time) Mode: (View Demo)
Scheduler Mode allows users to select both a date and a time slot based on defined availability. It is ideal for booking appointments, consultations, or callbacks before initiating the WhatsApp conversation.
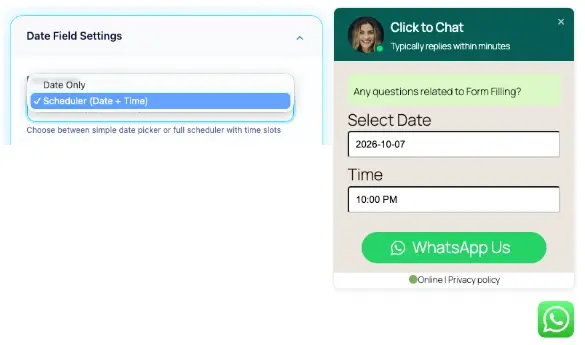
- In the Date Field settings, we can set the minimum notice, schedule up to, and duration for bookings.
In detailed Documentation of Greetings Form Date Field: Date Field Docs
Number (intl tel input):
A Number (intl tel input) field collects the user’s phone number with a country selector. This is the user’s number, it does not change the WhatsApp number receiving the chat.
Country Code Selection: Select your country from the dropdown menu. Enter your phone number in the provided field. The system will automatically validate that the phone number matches the format for your selected country.
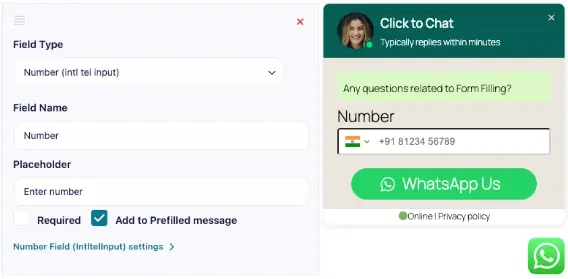
Intl Tel Input Settings
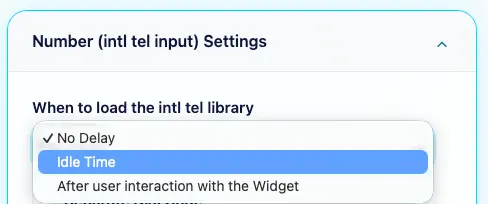
After adding a Number (intl tel input) field, use the Number (intl tel input) Settings accordion to configure its country selector and loading options.
When to Load the intl-tel-input Library:
- No Delay: Load the intl-tel-input library immediately when the form is loaded.
- Idle Time: Load the library after the browser becomes idle, with a short delay, or sooner if the user interacts with the widget.
- After User Interaction with Widget: Load the library when the user interacts with the WhatsApp widget.
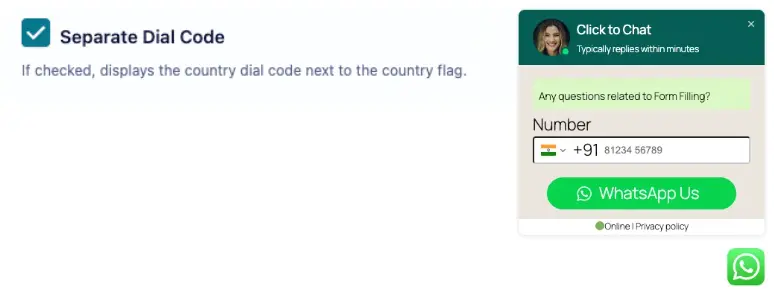
Separate Dial Code
If this option is checked, the country dial code is displayed next to the country flag in the input field.
- Country Selection: When the user selects a country from the dropdown list, the country flag and dial code are displayed.
- Dial Code Display: The dial code appears next to the flag, making it clear which code will be used when entering the phone number.
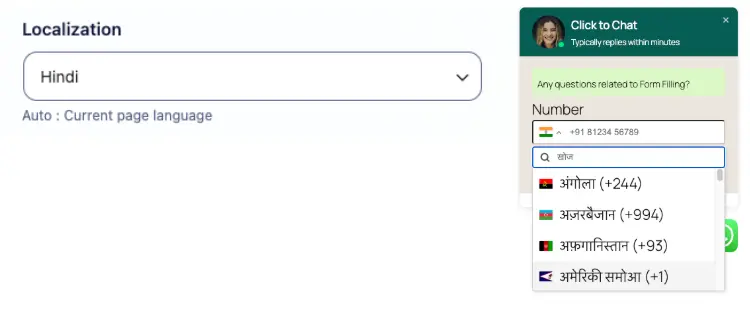
Localization
When set to “Auto,” the language used on the current page is automatically applied. Additionally, users have the option to select different languages.
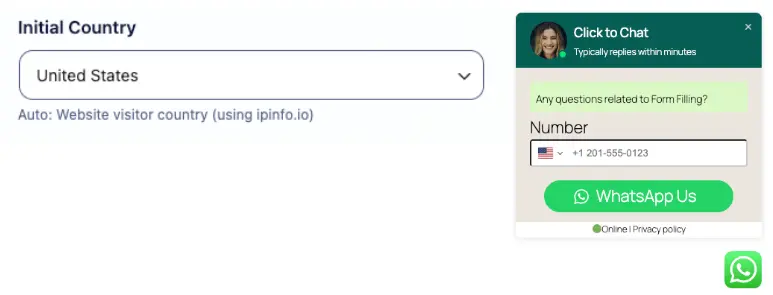
Initial Country Settings
When set to “Auto,” the plugin automatically selects the visitor’s country using ipinfo.io based on their IP address.
Hidden
A hidden field is an invisible input field used in forms. It can utilize variables like {url}, {title}, and {number} to capture the current page’s URL, the title, and the number assigned to the WhatsApp chat widget. These fields can dynamically pull values from URL parameters or cookies. When the user submits the form, the hidden field values are sent with the form data via email notifications or webhooks.
How it Works?
- URL Parameters:
- Retrieve values directly from URL parameters by enclosing the parameter name in single square brackets
[ ]. - Example:
- URL:
https://example.com?gclid=12345&utm_source=google - To get the value of
gclid, use[gclid]. - To get the value of
utm_source, use[utm_source].
- URL:
- If the parameter does not exist in the URL, the hidden field will be left blank.
- Retrieve values directly from URL parameters by enclosing the parameter name in single square brackets
- Cookies:
- Retrieve values stored in cookies by enclosing the cookie name in double square brackets
[[ ]]. - Example:
- To get the value of a cookie named
_ga, use[[ _ga ]].
- To get the value of a cookie named
- If the cookie does not exist, the hidden field will be left blank.
- Retrieve values stored in cookies by enclosing the cookie name in double square brackets
Example in Context :
To track a user’s Google Ads click ID (gclid) and the source of their visit (utm_source), along with a value stored in a cookie named _ga:
- URL:
https://example.com?gclid=12345&utm_source=google - Cookie:
_ga=GA1.2.3456789
Hidden fields might be defined as:
[gclid]captures the value12345from the URL.[utm_source]captures the valuegooglefrom the URL.[[ _ga ]]captures the valueGA1.2.3456789from the cookie.
You could set up your hidden fields like this:
[gclid] will capture the value `12345` from the URL.
[utm_source] will capture the value `google` from the URL.
[[ _ga ]] will capture the value `GA1.2.3456789` from the cookie.
In this case, your hidden fields might be defined as:
Hidden Field 1: [gclid]
Hidden Field 2: [utm_source]
Hidden Field 3: [[ _ga ]]
Important Notes:
- If the URL parameter or cookie doesn’t exist, the hidden field will remain empty.
- These values are dynamic and will change based on the user’s current URL and cookies.
- This method is often used to capture tracking information or user-specific data to be passed along to other systems.
This approach enhances forms by capturing relevant data seamlessly.
Required:
If “Required” is selected, it becomes mandatory for the users to fill the form field. It prompts an error message when unfilled.
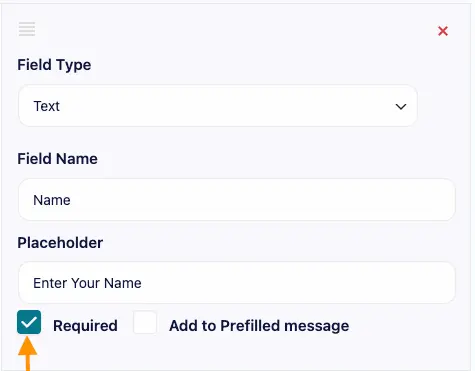
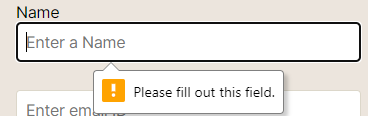
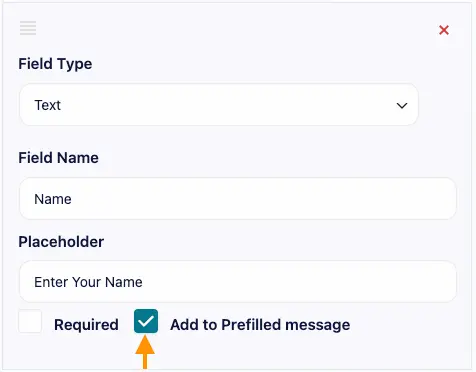
Add to Prefilled message:
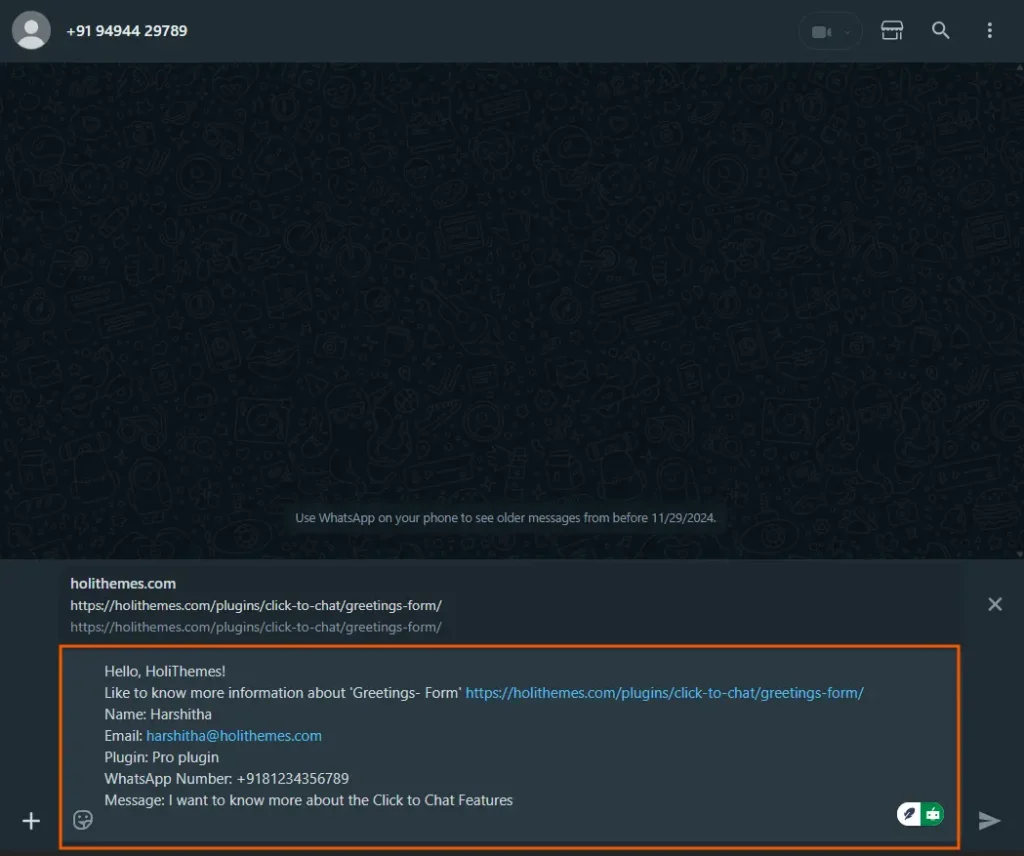
Enable Add to Prefilled message on each field whose value should appear in the WhatsApp message.
This will be automatically included in the Prefilled message, allowing us to send that data directly via WhatsApp.
Email Notification and Webhooks:
Email Notification
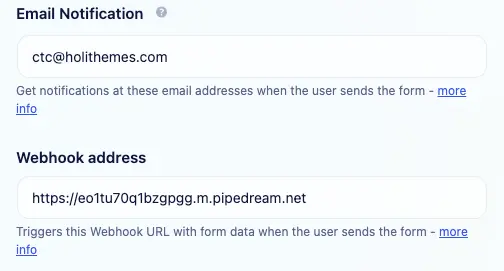
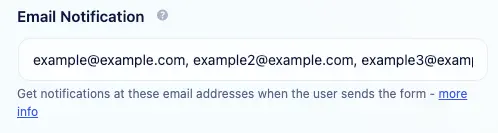
Enter the recipient address in Email Notification in the Greetings Form card. When a user submits the form, the plugin sends the form data to the configured recipients. Leave the field blank if email notifications are not needed.
- Multiple Recipients: We can enter multiple email addresses, separated by commas (
,), to send notifications to more than one recipient.
If cache plugins are active on the site, ensure the cache lifespan is set to less than 8 hours, or consider using webhooks for real-time data delivery.
Email Subject
To customize the subject line of the emails we receive when a customer submits the form:
Use a custom email subject to identify form submissions:
In the Greetings Form card, expand Email Notification Subject, Call to Action – button type.
- Enter a subject in Email Notification: Subject.
- Dynamic Fields: We can include dynamic placeholders like
{field_1},{field_2}, etc., which will be automatically replaced with the corresponding user input from the form fields.
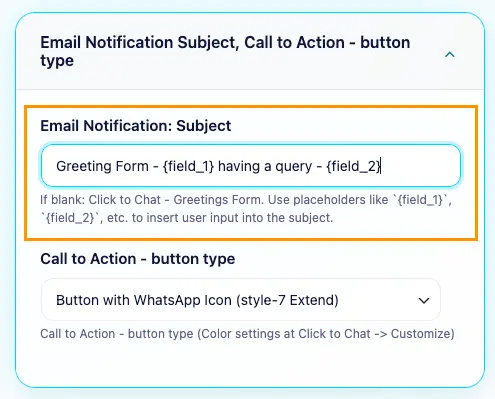
- This allows for more personalized and informative subject lines.
- Leave the subject blank to use Click to Chat – Greetings Form.
Webhooks
Enter the destination URL in Webhook address in the Greetings Form card. When a user submits the form, the plugin sends the form data to this URL. Leave it blank if no webhook is needed.
Integration Tools:
Create Webhook URL from integration tools like
Set Webhook data format under Click to Chat → Analytics → Webhooks if the receiving application needs a different format:
- JSON
- String (Stringify JSON)
Webhook Data Format Documentation
Call to Action Button type:
Expand Email Notification Subject, Call to Action – button type in the Greetings Form card, then choose a Call to Action – button type:
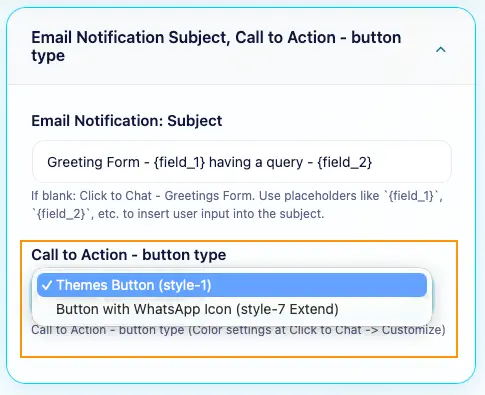
Themes Button (style-1): Uses the Style-1 theme button design
Button with WhatsApp Icon(style-7 Extend): The default option, with a WhatsApp icon beside the button text.
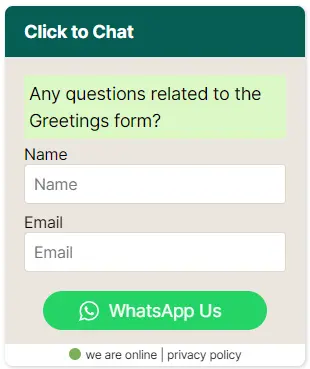
Color Customization:
Customize Background colors to Header content, main content, and message box. To change the colors, either enter a hexadecimal color value or select any color from the palette. Click on ‘Default’ to apply the default color.
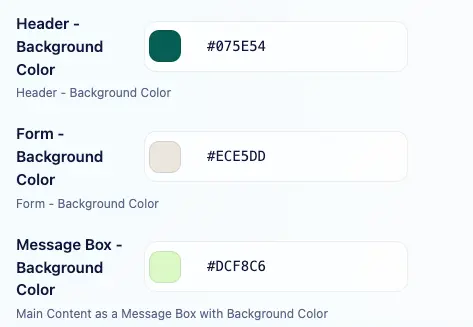
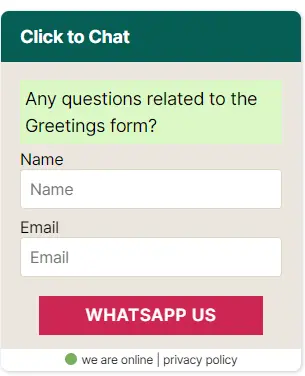
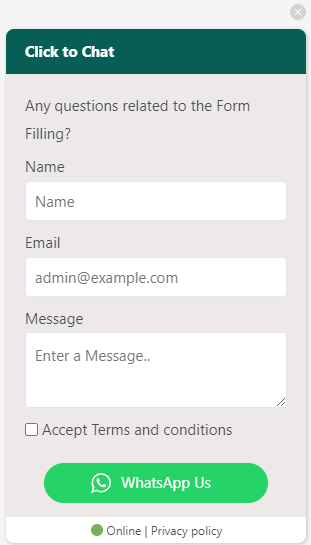
With the Default color values, the Greetings dialog- form appears like this:
Display:
In the Additional Settings card, use Display to choose the devices where the Greetings Form appears.
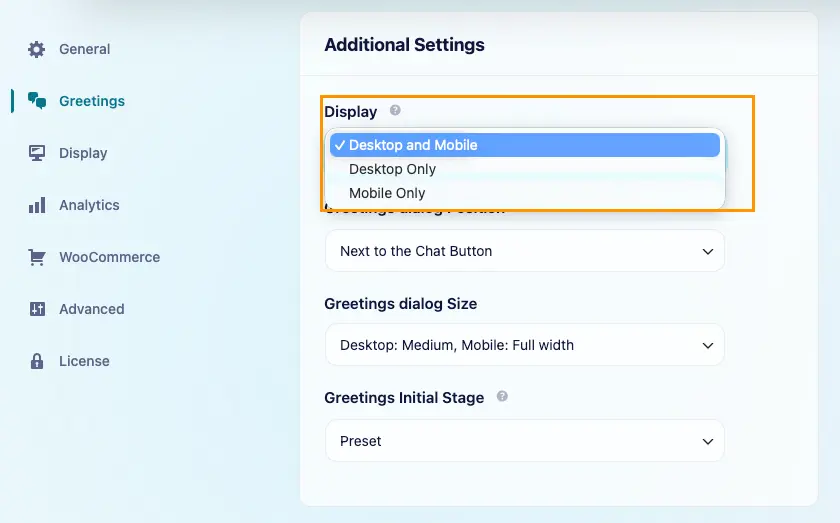
Desktop and Mobile: This is the default attribute. The greetings dialog appears on all desktop and mobile devices.
Desktop Only: Greetings dialog is displayed only on desktop devices.
Mobile Only: Greetings dialog is displayed only on Mobile devices.
Greetings Initial Stage:
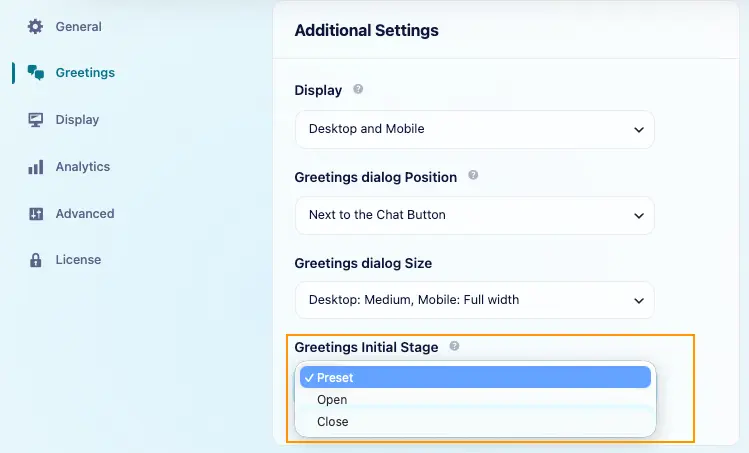
Set Greetings Initial Stage in Additional Settings:
- Preset: Opens on desktop for a first visit and stays closed on mobile; later behavior follows the user’s interaction.
- Open: Opens on page load. If the user closes it, it stays closed until reopened by the user or a Greetings Action.
- Close: Keeps the dialog closed until the user clicks the WhatsApp widget or a Greetings Action opens it.
Greeting Actions
Use the Actions card to open the Greetings Form after a time delay, page scroll, or user interaction.
🔗 Included in the PRO plan — View Pricing
- Set Greetings Initial Stage to Close when the form should open only after an action or widget click.
- In the Actions card, enable the option that prevents Time and Scroll actions from reopening Greetings after users close it.
Time Action:
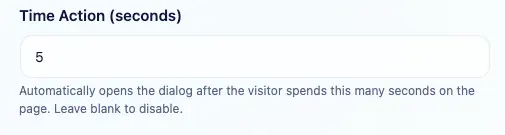
Enter a value in Time Action (seconds), such as 5, to open the dialog after that delay. Leave it blank to disable the time action.
With Open, the dialog can appear before the time action. Use Close if it should wait for the delay.
The time action can reopen the dialog on another page unless automatic reopening after closing is disabled in the Actions card.
Scroll Action:
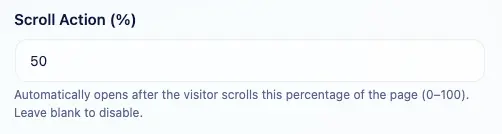
Enter a percentage in Scroll Action (%), such as 50, to open the dialog after the user scrolls that percentage of the page. Leave it blank to disable the scroll action.
Time and Scroll actions work independently. If both are configured, either can open the dialog when its condition is met.
Click Action:
Add the ‘ctc_greetings’ class name to any element. When the user clicks on that element, the greetings dialog appears.
Click this button to see the Greetings Click Action Demo
Text Editor Tips:
- Toolbar Toggle: To explore all the menus in the text editor, click on the toolbar toggle and customize accordingly.
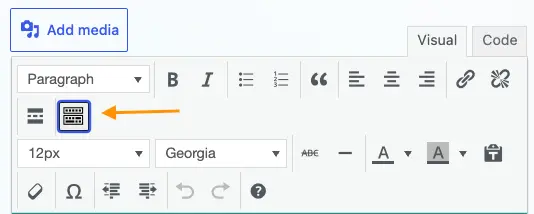
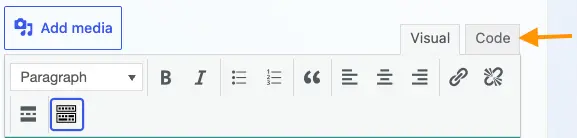
- Visual/Code: Use Visual mode to edit the content directly, or Code mode to edit its HTML.