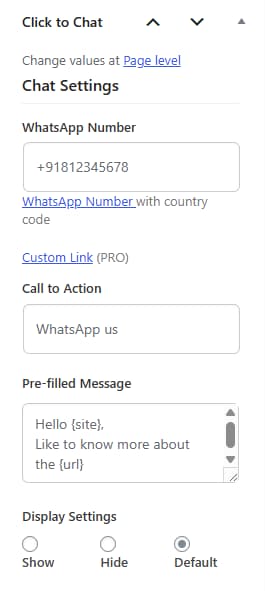
We can customize the WhatsApp number, call to action and pre-filled message for any specific page or post. These page-level settings will override the global settings only on that particular page and will not affect any other pages on the website.
To enable or disable Page-Level Settings, refer to this documentation.
Why Use Page-Level Settings?
Sometimes, we may want a different WhatsApp contact or message on a specific page — for example:
- A different WhatsApp number for the support page
- A unique greeting message on a product page
- A special call to action for a landing page
Page-level settings make this possible without changing the global settings.
How to Add Page-Level WhatsApp Settings
- Open the editor for the page or post where we want to apply different WhatsApp settings.
- Locate the Click to Chat section (usually in the sidebar or below the content).
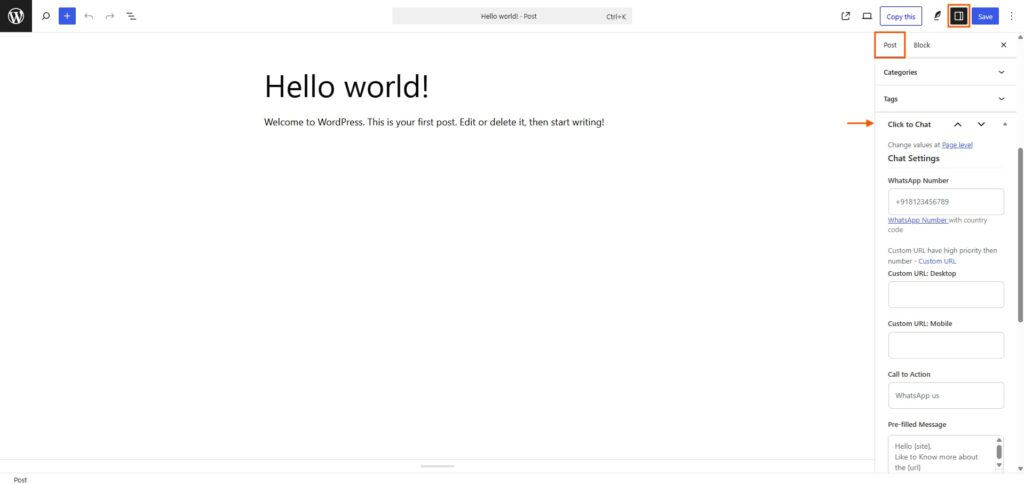
Add or update any of the following fields as needed for the specific page/post:
- WhatsApp Number
- Call to Action text
- Pre-filled Message
- Save or update the page/post.
What Happens Next?
- This helps set up as many unique configurations as needed — without affecting the rest of the website.
- The plugin will use the page-level settings only on that specific page or post.
- The global WhatsApp settings will continue to work on all other pages.
Additional Page-Level Options in Pro
In the Pro version, we can further enhance control over each page’s WhatsApp widget using
🔗 Included in the PRO plan — View Pricing
Different Widget Styles
Apply different styles to different pages for a customized look.
Example:
Style 4 on the Shop page, Style 2 on the Cart page, and Style 99 on the Checkout page.
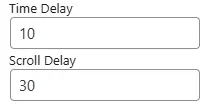
Time Delay
Display WhatsApp after a delay (in seconds) on a specific page.
Example:
If Time Delay = 5 → WhatsApp appears 5 seconds after the page loads.
Scroll Delay
Display WhatsApp after the user scrolls a certain percentage of the page.
Example:
If Scroll Delay = 50 → WhatsApp appears after scrolling halfway down the page.
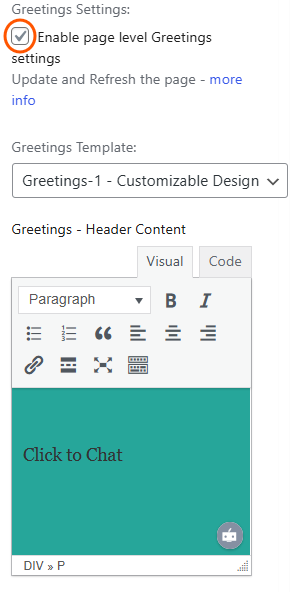
Greetings
Enable page-level greeting templates to show a unique greeting dialog Content on each page.
After enabling, update the post and refresh to load the custom greeting fields:
- Header
- Main Content
- Bottom Content
Important Tips
After making changes, it’s a good idea to clear the site cache and browser cache to ensure the updates appear properly.