The Click to Chat Pro plugin is an add-on to the Click to Chat main plugin. To run the PRO version, the Click to Chat main plugin must be activated.
- Log in to your HoliThemes Shop account using the email and password used during purchase. If the purchase was made as a guest, create a new account using the same email and checkout details, then log in.
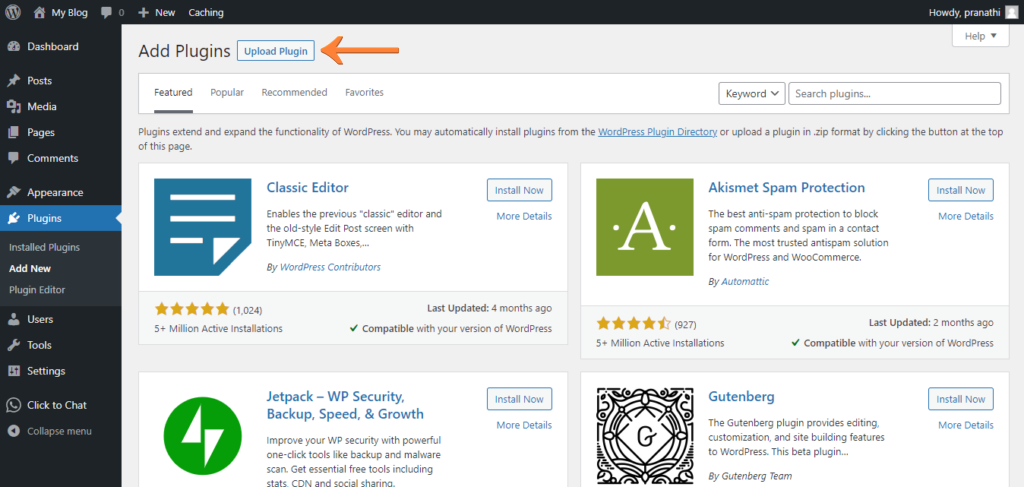
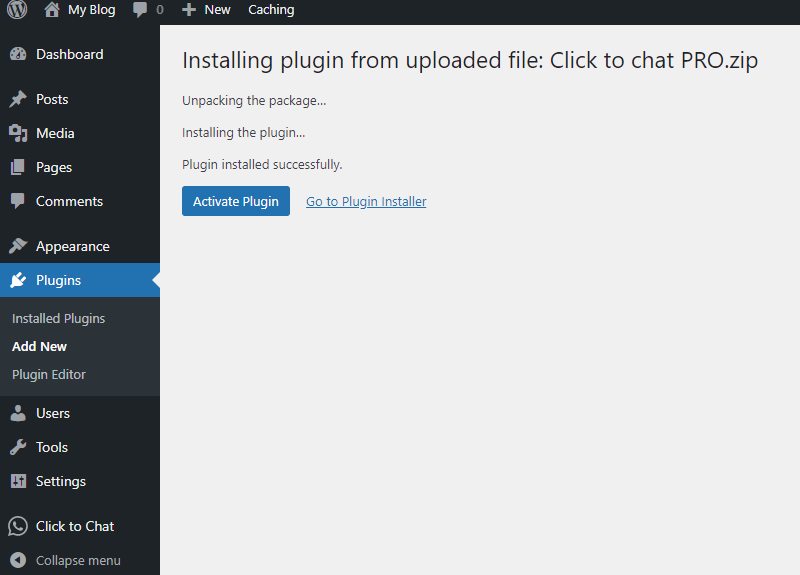
- From the WordPress admin Dashboard navigate to Plugins -> Add New
3. Click on Upload Plugin.
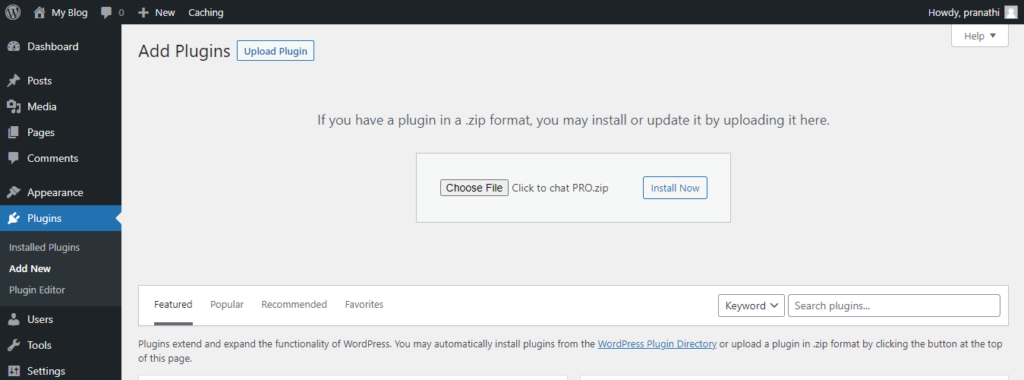
4. Drag and drop/select the downloaded zip file from the Holithemes website and click on Install Now.
5. Click on Activate Plugin to activate the plugin.
Click to Chat PRO is now activated. It works as an add-on to the main Click to Chat plugin — both plugins are required for full functionality.
Activating License Key
- After installing the PRO plugin, log in to the HoliThemes Shop account.
- And then in the Purchase History, Click on View Licenses

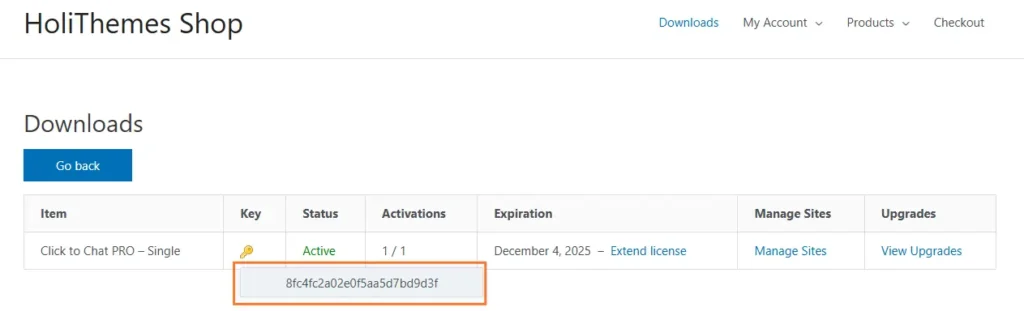
3. After that, we see a list of all the items we’ve purchased so far. In the table, there is a key icon next to each item. Clicking on this icon reveals the License Key, which can then be copied for use
4. We can get the license key by clicking on Manage Sites on the same table.
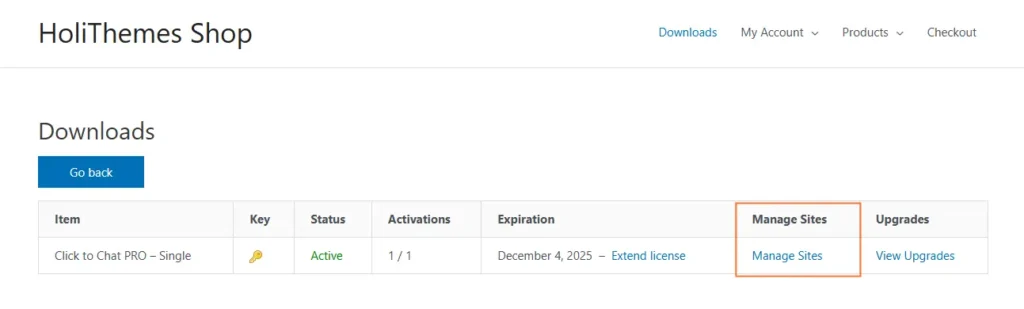
5. In the ‘Manage License’ section, you’ll see a table displaying site URLs along with Actions. Above this table, you can view the License Key, which can be copied For Activating

We can proceed with either of the two steps to obtain the License Key for activating the Click to Chat Pro plugin.
7. Now, navigate to the click to chat admin settings, and in the sidebar, we’ll find “Click to Chat Pro – Software License“.
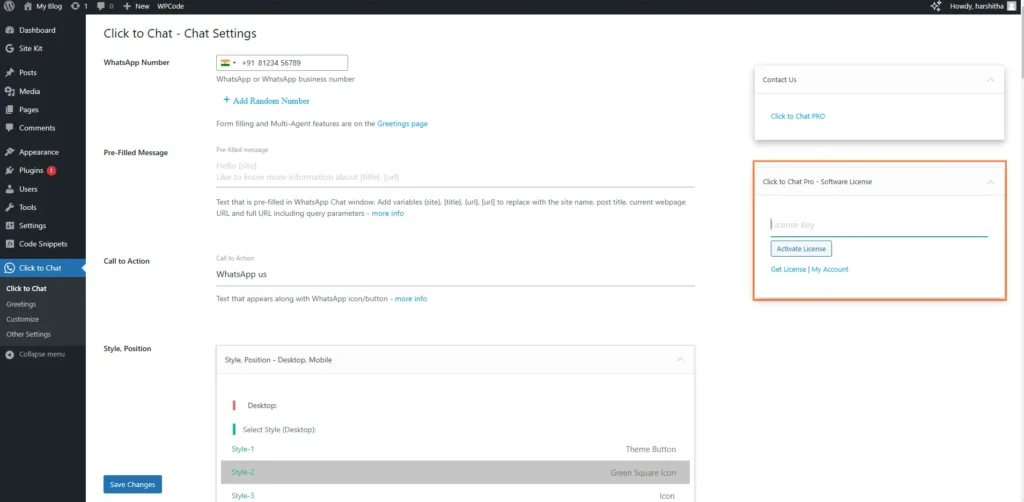
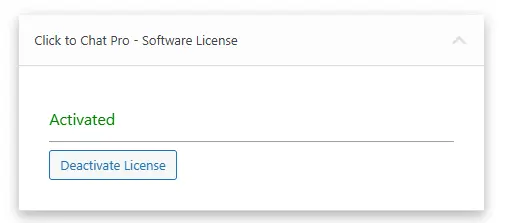
8. Click on it, paste your License Key, and then click the ‘Activate License’ button.